Sentinel Hub QGIS Plugin
The QGIS Plugin lets you view satellite image data from Sentinel Hub directly within a QGIS workspace. All datasets that are part of collections associated with your user are available, including commercial data within Sentinel Hub subscriptions and Bring Your Own COG datasets. The current functionality of the QGIS Plugin is for visualization and it does not allow you to perform operations or access properties of the dataset. For individual downloads, Planet recommends the Browser. For downloading multiple datasets for an area and time period of interest in a graphical interface, using the API is the optimal tool.
Authentication
Before you start, you must have an OAuth client prepared in your Sentinel Hub Services Dashboard. Use the OAuth credentials to authenticate from QGIS and access these services.
To register an OAuth client, complete the following steps:
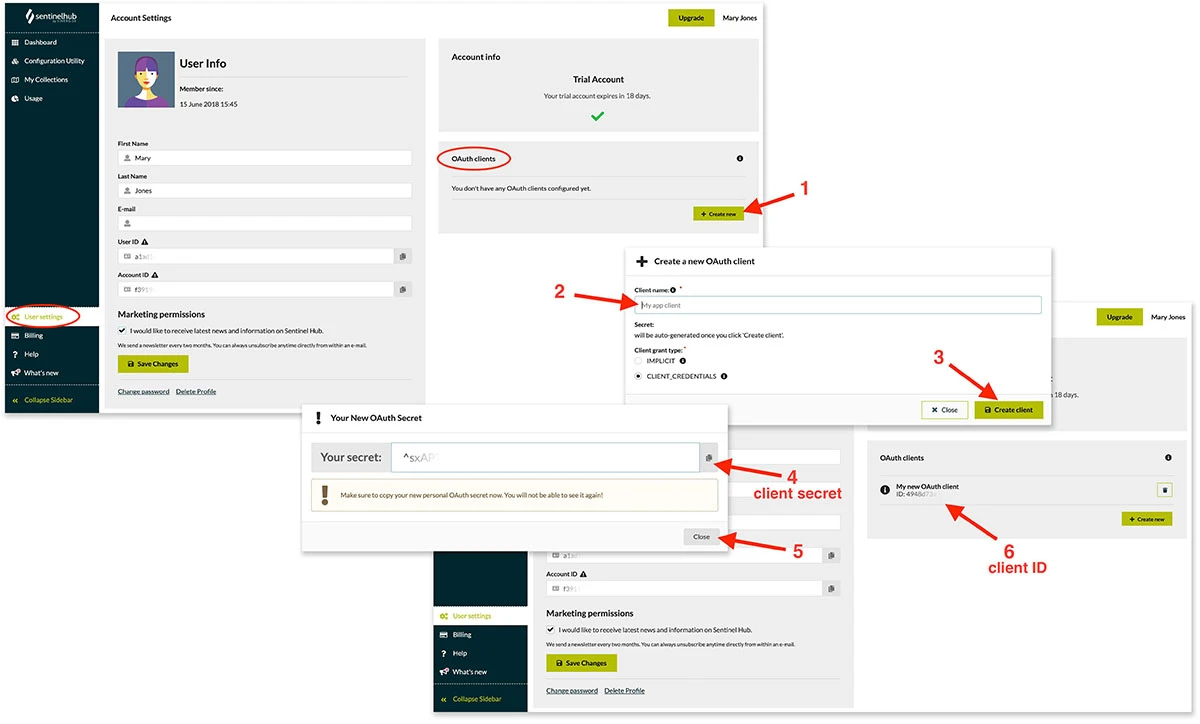
Open the User settings tab in your dashboard, then click the Create button In the OAuth client section
Give your OAuth client a name
Set the Client grant type to Client Credentials and click Create
Your client secret will be displayed; copy the secret value and save it locally or to a password manager
Click Close
The newly created OAuth client name and ID can be viewed in the list of your OAuth clients
To install the plugin from the QGIS plugin repository, complete the following steps.
Select Plugins → Manage and Install Plugins from the main menu in QGIS
Use the search box to search for SentinelHub
Select the plugin and click Install Plugin
Open the plugin from the QGIS toolbar
Paste in your Client ID and Client Secret. These will be remembered for next time you launch QGIS
Click Login
Creating a Configuration
You must create a configuration in the Sentinel Hub Services dashboard to use the plugin. This configuration will define the data layers you want to access in QGIS and the settings for these layers. You can create multiple configurations for different data sources or different visualization settings.
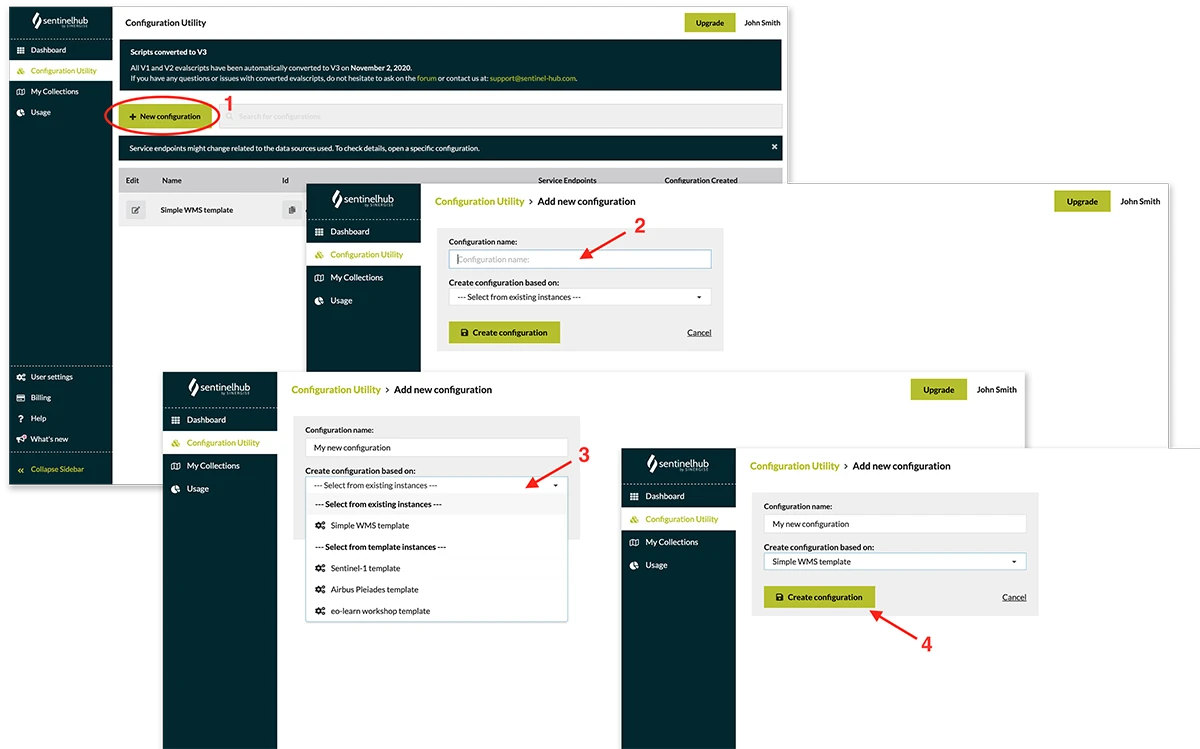
Select Configuration Utility on the Sentinel Hub Services dashboard's left panel. Here, you will see a list of all configurations you created earlier.
Click the New button
Give your Configuration a name
You then have the option to create a configuration based on one of the existing instances by changing the settings
Click Create configuration
The warnings toggle decides whether you will see a warning message if you try to show or download an area larger than the limit. The Show logo setting does not affect your QGIS Plugin and there is a toggle for this on the download panel of the plugin where you can set this.
Image quality for visualization can be set using the slider or numerically, and the boundaries of the dataset can be selected in a small map window (Map bounds). Under Advanced settings, a window opens where you can edit a JSON configuration.
Do not toggle Disable OGC requests on if you are creating a configuration that you want to access in QGIS as the plugin is based on OGC requests
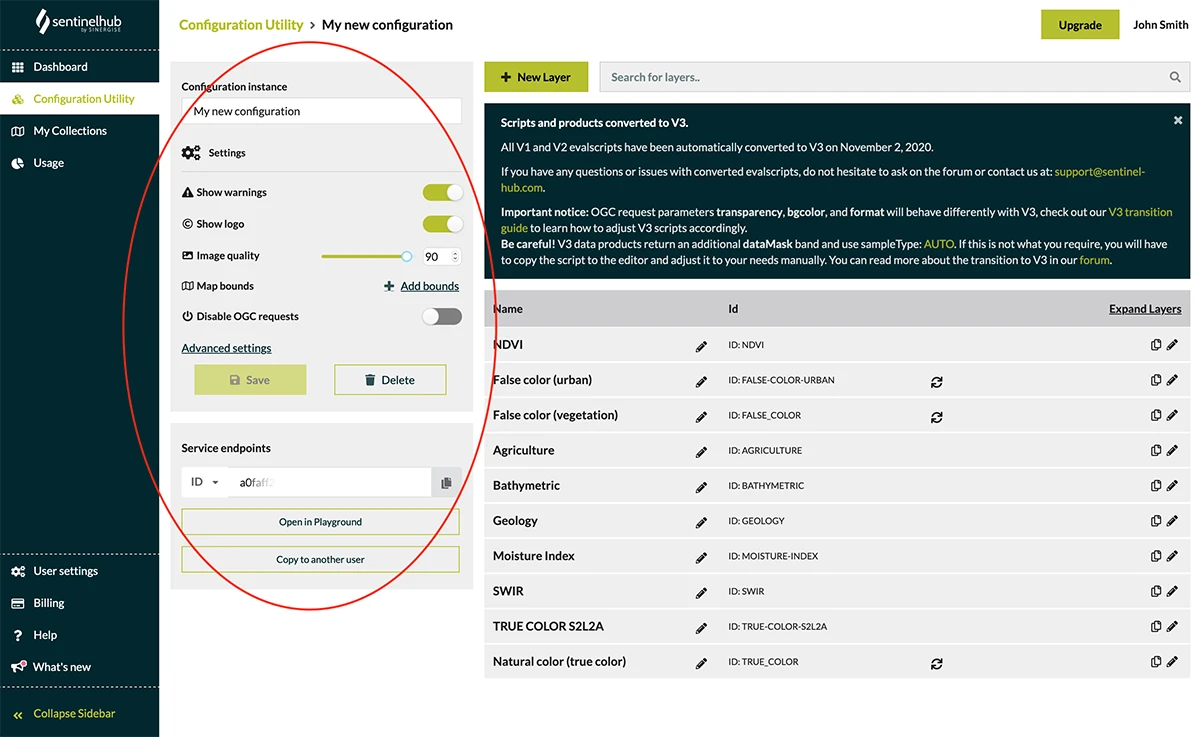
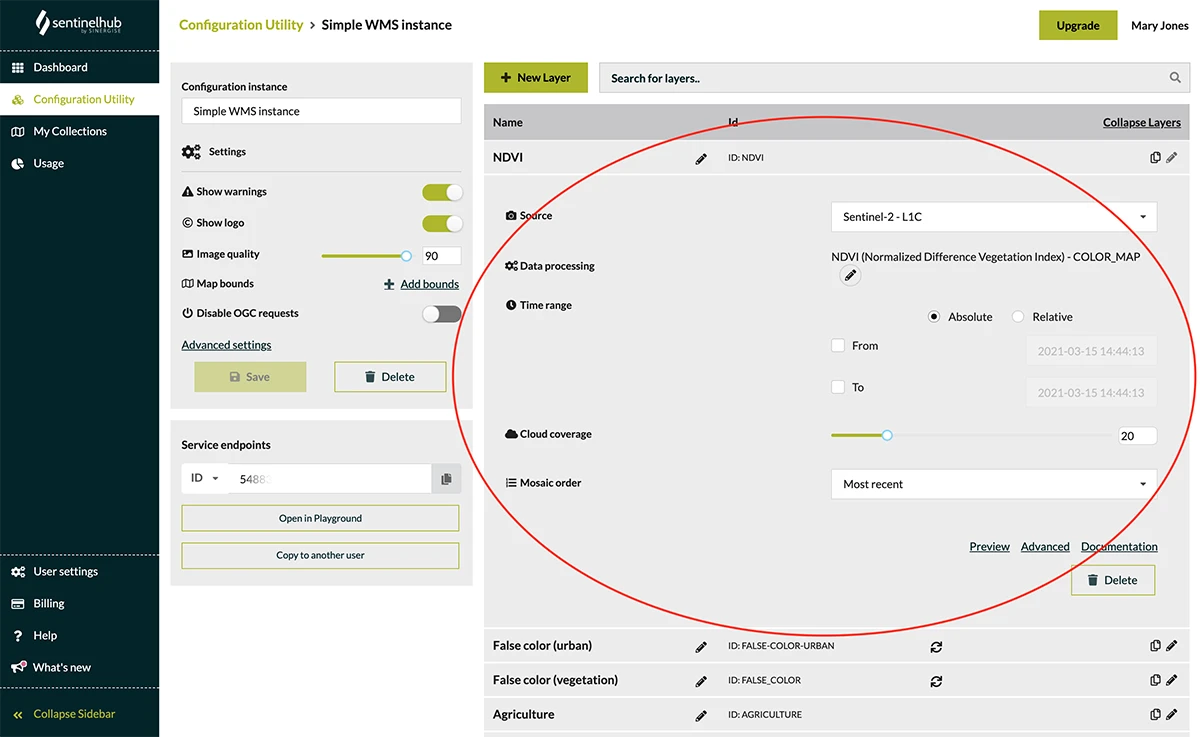
The New Layer button opens the form for setting the data layers in your configuration. Here you can prepare the dataset you want to view in QGIS. You can configure settings such as:
- A name for your layer
- An imagery data source from available Collections
- An evalscript - the pencil icon opens a panel where you can select from predefined evalscripts or edit your own, optionally based on the Custom script repository.
- Time range
- Cloud coverage threshold
- Mosaic order (most recent, first, least cloudy)
For one configuration, you can create several layers that will be available as options in QGIS.
Creating and Updating a Data Layer in the Plugin
From the Create tab, select a Configuration. The configurations available in your dashboard are listed here. These can be used to choose between configurations of different data sources (For example, Sentinel-2 and Sentinel-3) or different evalscript settings.
Select Service type based on the data you want to use. You typically will need WMS for this case, as the images are in raster format. WMTS and WFS services are also available if you want to perform more advanced queries or bring your own areas of interest.
The Layer menu allows you to select between the different visualization layers in your configuration. For the default Sentinel-2 configuration, this menu includes a wide range of visualization options similar to the Browser.
CRS refers to the Coordinate Reference System. You can set the coordinate system of the dataset. For Sentinel Hub imagery data layers, this should keep the default value of EPSG:3857.
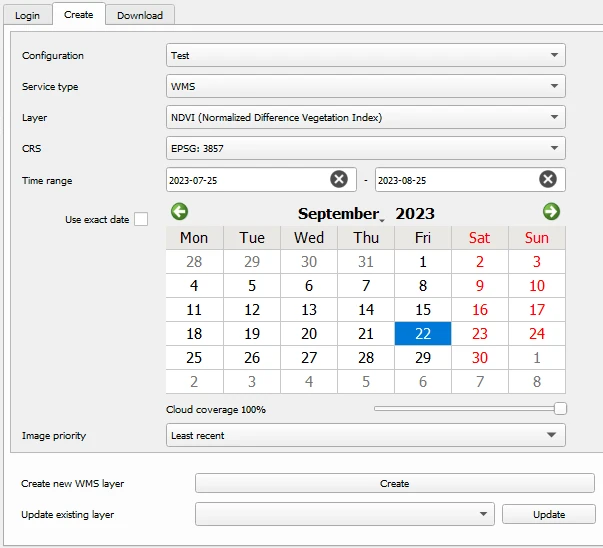
In the Time range bar and the calendar panel, choose the start and end date of the period of interest and set an Image Priority order for mosaicking the data layers. Alternatively, if you are interested in images for specific dates, click Use exact date to turn off mosaicking.
Calendar dates where an image is available within the selected Cloud Cover ratio for the current map extent will be highlighted. You can set the Cloud Cover threshold using the slider below the calendar. If you are using mosaicking within a time range, you can set the Image Priority using the dropdown menu to include the most recent, the first, or the least cloudy image of the time range in the mosaic for each pixel.
Once the settings are specified, you can choose to create a new WMS layer in your QGIS workspace or update an existing layer.
The Update existing layer option is set by default to the selected layer. If you want to look at a different date, click on the date in the calendar and update the layer. If you're going to compare, create a new layer for the new date, and you can use QGIS visualization tools such as transparency.
Downloading Imagery
On the Download panel, you can download a three-channel RGB rendering of the image on your map window. File format and image resolution can be selected, and optionally, a custom bounding box can be added with coordinates.