Planet Add-in for ArcGIS Pro
The Planet Add-in for ArcGIS Pro provides access to Planet satellite imagery directly from ArcGIS Pro. With the add-in, you can access the following features:
- Image Search: Search the Planet Imagery catalog to find and order imagery when and where it is needed.
- Order Status: View the status of your orders and add them to your maps.
- Visualize Data Collections: Stream and analyze Planet data hosted on Planet Insights Platform directly in ArcGIS Pro, without downloading files.
- Planet Basemaps: Search for Planet Basemaps to stream for visualization or download for analysis workflows.
- Planet Inspector: Inspect the source images and their metadata for Basemaps that you have added to your maps.
- Planet Tasking: Specify coordinates for high-resolution tasking to send to the Planet Tasking Dashboard.
Setup Guide
Requirements
- ArcGIS Pro 3.0+
- Python 3.6+
- Planet account
If you use version 2.x of ArcGIS Pro, you must use version 2.2.1 of the Planet Add-in for ArcGIS Pro. This is the last version of the Planet Add-in for ArcGIS Pro that supports 2.x and there will be no future updates, patches, or fixes. You may download version 2.1.1 of the add-in. Update to ArcGIS Pro version 3.x to access to the latest Planet Add-in for ArcGIS Pro.
Installation
Download the Planet Add-in for ArcGIS Pro
Double click the
.esriAddinXfile and follow the instructions to install the add-in. See Esri instructions for installing add-ins for helpIf ArcGIS Pro is open, exit and restart the application
Open a project and click on the Planet Imagery ribbon on the top
Select the Account icon from the Planet Imagery ribbon to log in, then authenticate using your Planet username and password
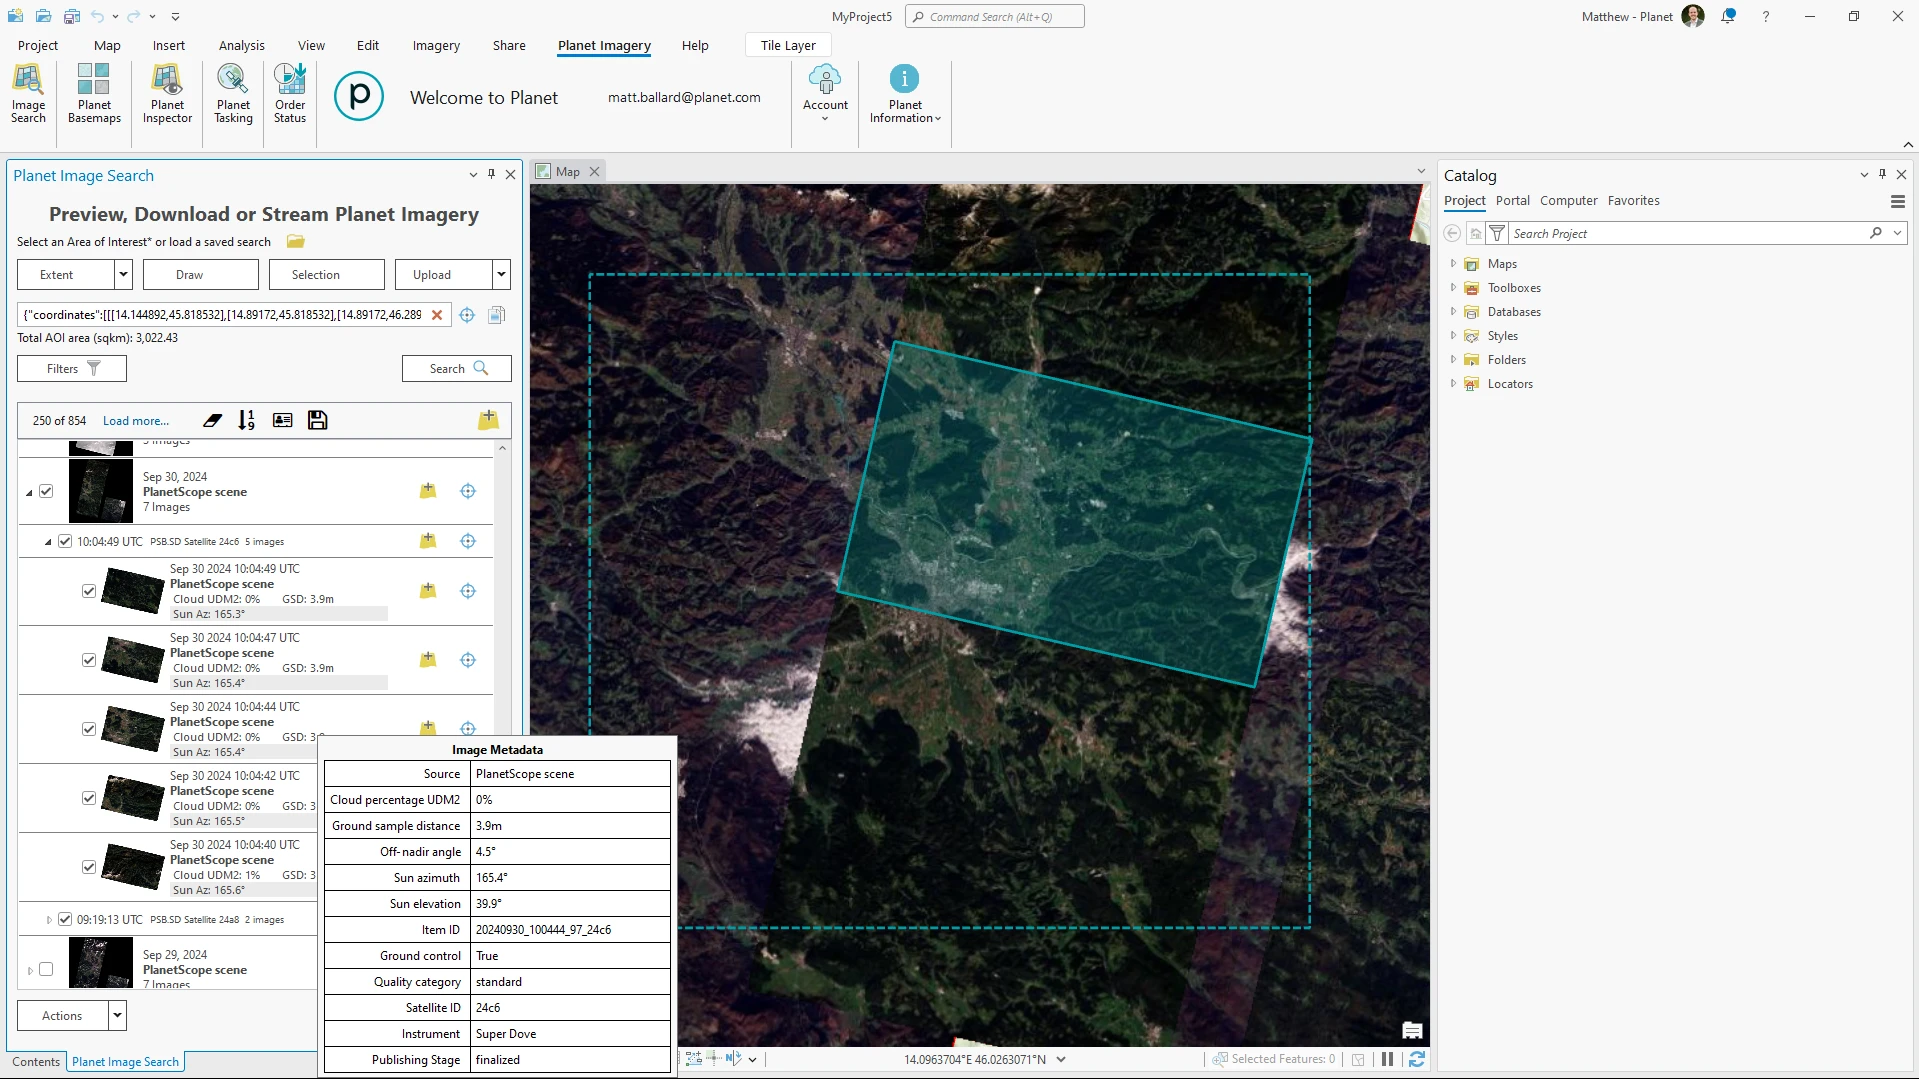
Search for Imagery
The Planet Add-in for ArcGIS Pro provides a search interface that allows you to filter imagery by date, cloud coverage, and more. You can use it to search for imagery that you would like to order.
Open the Image Search panel from the Planet Imagery ribbon
Set an AOI using the options at the top for map extent, file upload, map layer extent, or by drawing a polygon
Select the Filters tab to the left of the Search button on the Image Search Panel
Specify your search filters, such as for maximum cloud coverage, time of interest, satellite constellation, and more
Select Back from the top-left
Select Search in the Imagery Search Panel
The panel will display a list of images that match your search criteria. Imagery search results are grouped by date and product type.
You can explore your search results even further by selecting the drop down arrows left of each result. This will show satellite strips from a date, and can be expanded further to see specific images.
Metadata
Hovering over an item in the search results displays a pop-up window containing the item's metadata. You can configure what metadata is shown in the panel by selecting configure metadata results above the search results.
Saved Searches
You can save your search parameters to your account so that they can be reused to order again.
Select the Save Search button to the top of the search results
Give your search a name
(Optional) Select No End Date if you want to have the search always display the most recent imagery
Select Save
Stream Preview Tiles
You can stream preview tiles to inspect images before ordering. Preview tiles are compressed, lower-resolution, 8-bit, 3-band images that are ideal for quick visual inspection of the imagery.
Select images in your search results that you would like to view by toggling the checkbox
Select the Add Images to Map button to the top right of the search results
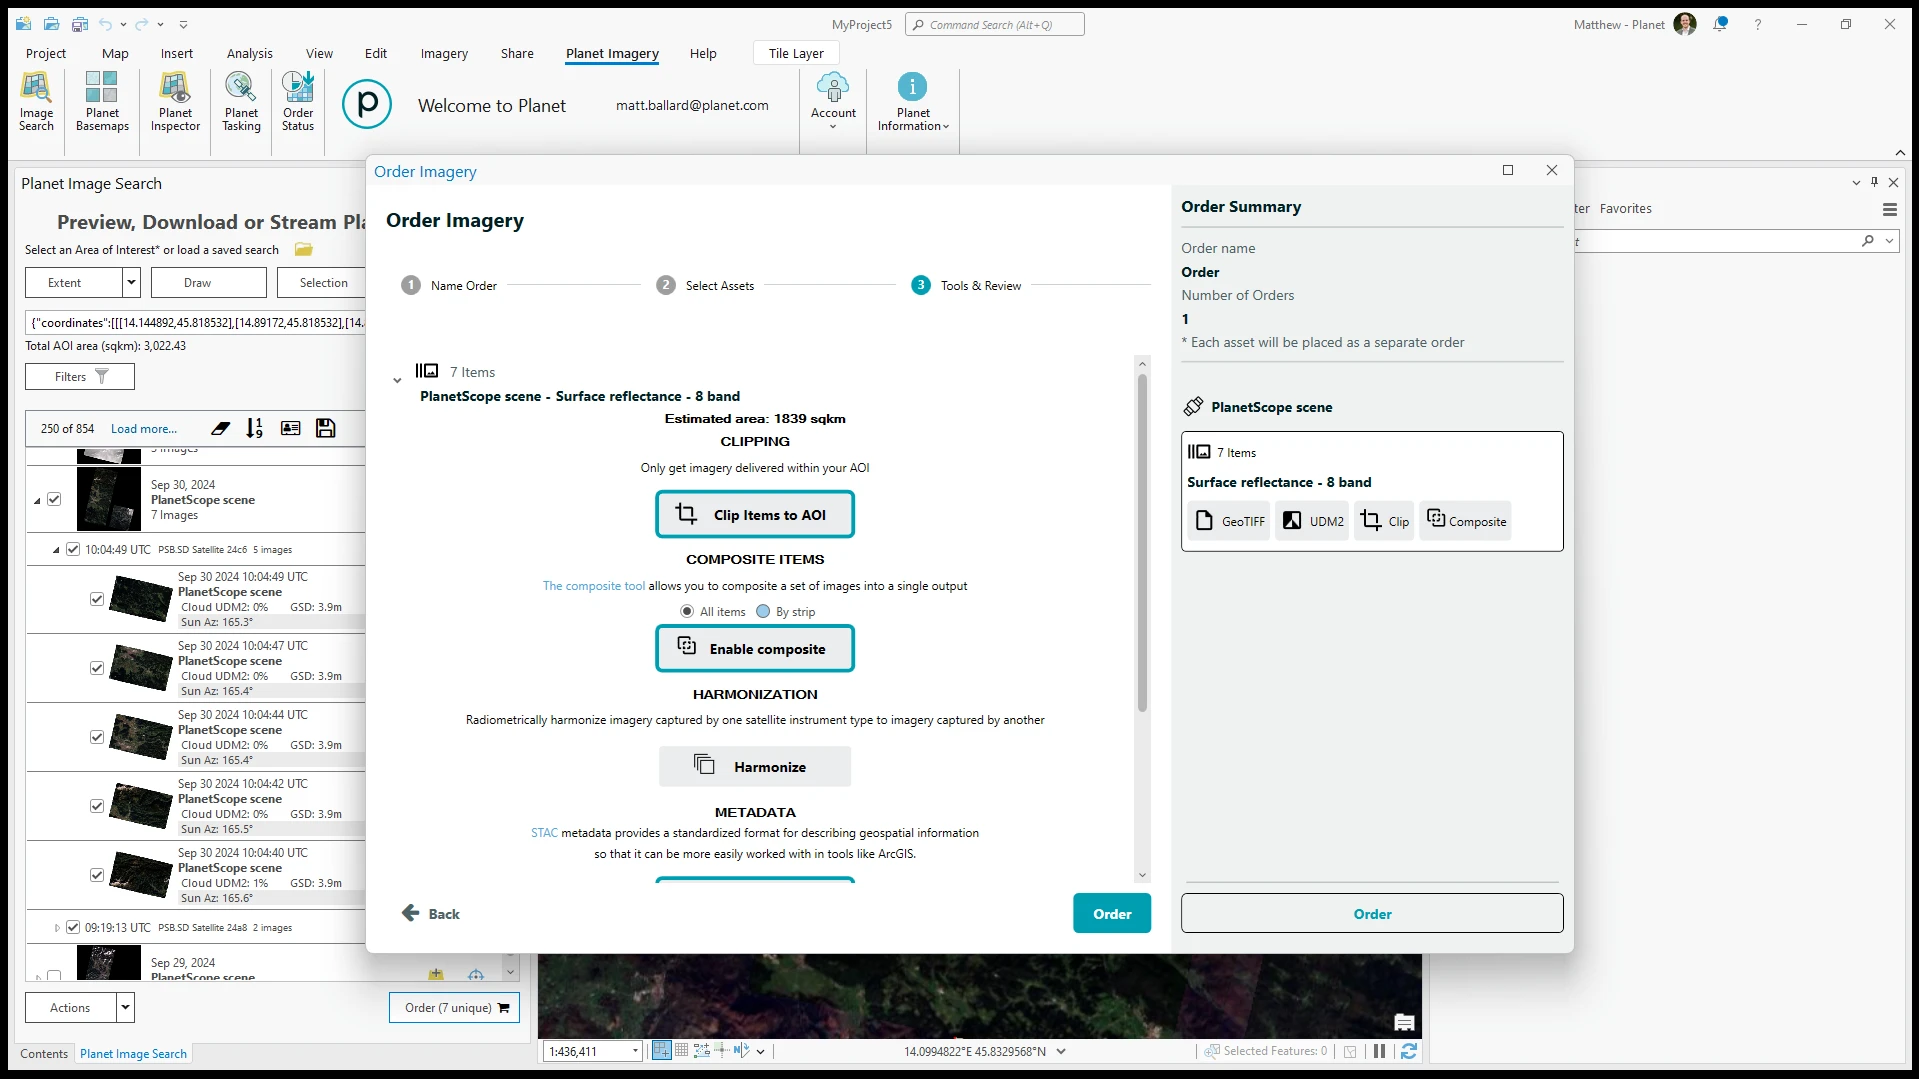
Order Imagery
Once you have found the imagery you want, you can order it directly from the add-in. This will provide you with the full-quality image with full bit-depth, spatial resolution, and spectral bands.
Select images in your search results that you would like to order by toggling the checkbox
Select the Order button to the bottom right of the search results
Enter an order name and select continue
Select the asset that you would like to order
Toggle on any of the available tools that you would like to be used for the order
You can read more about tools for ordering here. Available tools are dependent on the asset type and the tools that are available to you. Clipping supports arbitrary polygons as well as multipolygons, so long as the vertices count is less than 500.
Order Status
Once an order has been placed, you can monitor its status and download it (once available) from the Planet Order Status Panel. The Order Status Panel displays orders for both imagery scenes and Basemap quads.
- When an imagery scene is available for download, a Download button will appear for the order.
- If you've already downloaded the order, you will see an option to Re-Download.
- You can also select Show in File Explorer to open the file location where the imagery was originally downloaded or select Add to Project Catalog to view the folder from the ArcGIS Pro catalog.
- Once your order has finished processing, you can select Add to Map. Using the Add to Map button in the Order Status Panel will automatically render your data in true color RGB.
Visualize Data Collections
Use the Visualize feature to explore and stream data collections directly in ArcGIS Pro. This feature connects ArcGIS Pro to cloud hosted data, allowing you to view and analyze imagery without downloading it.
You can visualize any data collection that you have created or that has been shared with your account. Access depends on your Planet account permissions and subscription type.
Order to a Data Collection
You can deliver imagery directly to a data collection:
In ArcGIS Pro, open the Planet Imagery tab and start a new order
In the Order Imagery window, select Data Collection as the delivery destination
Choose an existing Data Collection or create a new one to store your imagery
(Optional) Apply a predefined configuration by selecting Create Configuration during ordering to visualize your data immediately after processing
After the order completes, open the Orders Panel to access quick links for opening or visualizing your Data Collection
When you order imagery with the data collection destination, imagery is stored in the cloud instead of being downloaded locally, and you can stream it into your GIS software. This saves you time and local file storage, while making it easier to share imagery with others.

Stream Your Data Collections
After your imagery has been delivered to a data collection, you can visualize it directly from the Order Status panel. Use the Visualize options to stream your ordered imagery without downloading files.

Once visualized, you can apply different configurations to adjust how the imagery appears, such as NDVI, False Color, or True Color views.

Visualizing from the Order Status panel provides instant access to your processed imagery and saves time by eliminating the need for local downloads.
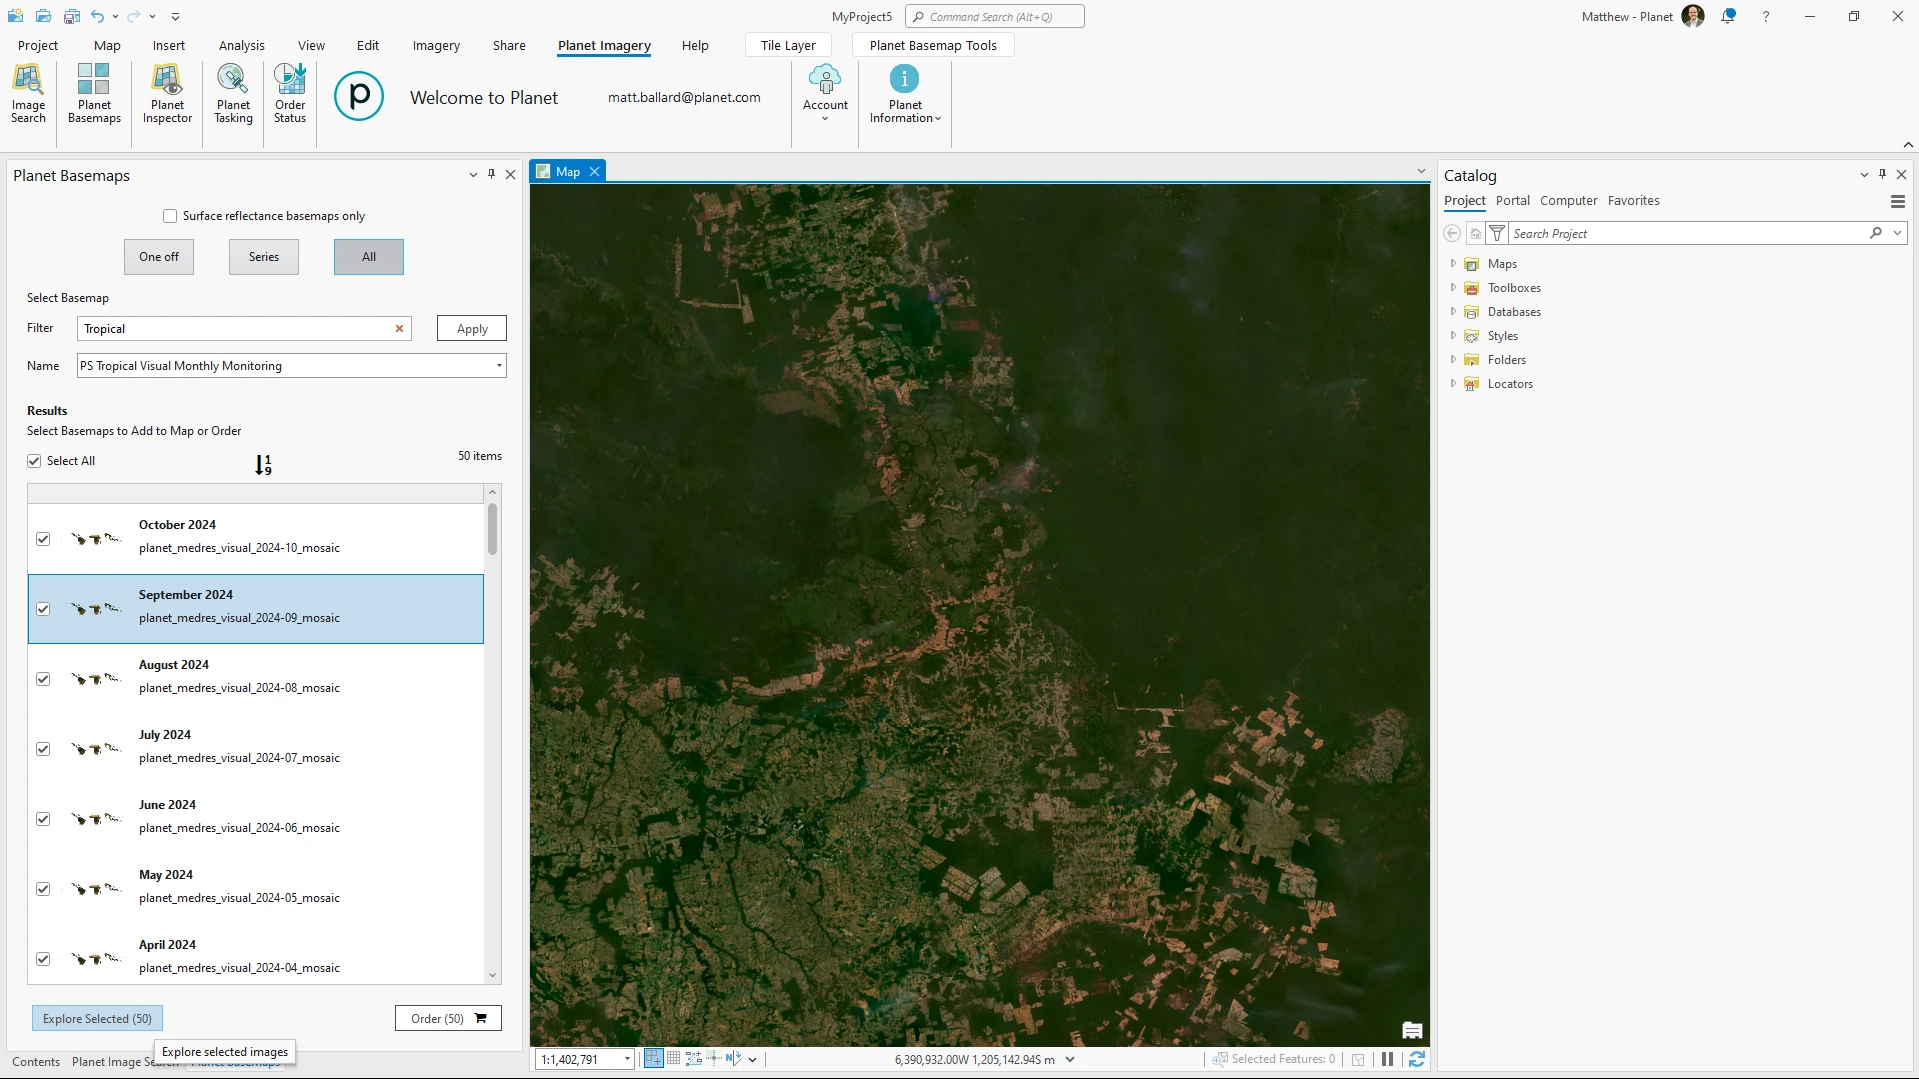
Explore Basemaps
If you have access to Planet Basemaps, you can use the add-in to:
- Search for available basemaps
- Stream basemaps for visualization
- Inspect basemaps to identify pixel provenance and metadata
- Download basemaps
If you want to learn more about working with Planet Basemaps, please see documentation Planet Basemaps and the Basemaps API.
Search and Stream Basemaps
Basemaps are organized into three categories: One Off, Series, and All. Which basemaps you can access will depend on your account's permissions.
- The One Off filter returns basemaps that were purchased and produced for a single AOI (Area of Interest) or TOI (Time of Interest). These basemaps are not part of a time-series.
- The Series filter returns basemaps that are part of a time-series. Time-series basemaps are typically produced at regular intervals, such as monthly or weekly.
- The All filter is a catch-all category that includes both One Off and Series basemaps. It also provides a text filter that allows you to search for basemaps using keywords.
All basemaps can also be filtered by the Surface Reflectance Only option. Applying this filter limits results to basemaps that have been atmospherically corrected for surface reflectance values.
Toggle on or off the Surface Reflectance basemaps only option
Select the One Off, Series, or All filter
Use the additional filters to identify the basemap you want to visualize
Select a basemap or a series of basemaps from the results by toggling their checkbox. For series, you can choose Select All
Select Explore Selected and the basemaps will be streamed to your map for visualization
Once basemaps are added to your map, a new Planet Basemap Tools ribbon will appear. This ribbon let's you apply different visualization options and view different time steps in a series.
Inspect Basemap Source Scenes
Basemaps are composed of multiple source scenes. You can inspect the source scenes and their metadata for a basemap that you have added to your map.
Before inspecting, ensure:
- The basemap you want to inspect is selected in the ArcGIS Pro table of contents.
- If using a Basemap Series, confirm that the specific temporal instance is active using the Planet Basemap Tools ribbon.
- Zoom to the area of interest that you'd like to inspect.
Once you've set up the basemap, you can inspect the source scenes:
Open the Planet Inspector panel from the Planet Imagery ribbon
Select the pencil icon and click on a point on the map. The source scene for that pixel will be displayed, showing metadata such as the collection date and UTC time
Select the Clipboard to copy the item ID, or select the search icon to search for the image.
In the Search Panel, you can explore additional metadata, stream a preview image, or download the source image that was used to create the basemap.
Download Basemaps
Planet Basemaps are distributed as a grid of GeoTIFF files which are called Basemap Quads. You can download these quads through the add-in.
Select the basemap instance or instances that you would like to download from the Basemaps Panel search results
Select Order from the bottom-right of the panel
Select either Download quads from an area of interest or Download Complete Basemap
Download quads from an area of interest
If you choose this option, you can constrain your download to a specified area of interest.
Select Download Quads from an Area of Interest
Provide an area of interest using the Extent, Draw, Selection, or Upload tools
Select Find Quads to query the Basemaps API to find all the quads across the basemap instances you selected for download
Toggle the checkbox for the quads you would like to download
Select Next
Give the order a name
Select Submit Order
Download complete basemap
This can be used for small areas. If you select too large of an area, a warning will pop-up. To download large areas, we recommend that you use the Basemaps API.
Select Download Complete Basemap
Select Next
Give the order a name
Select Submit Order
Select Open Planet Status Panel
Select Download and pick a folder to save the basemap to
Task Imagery
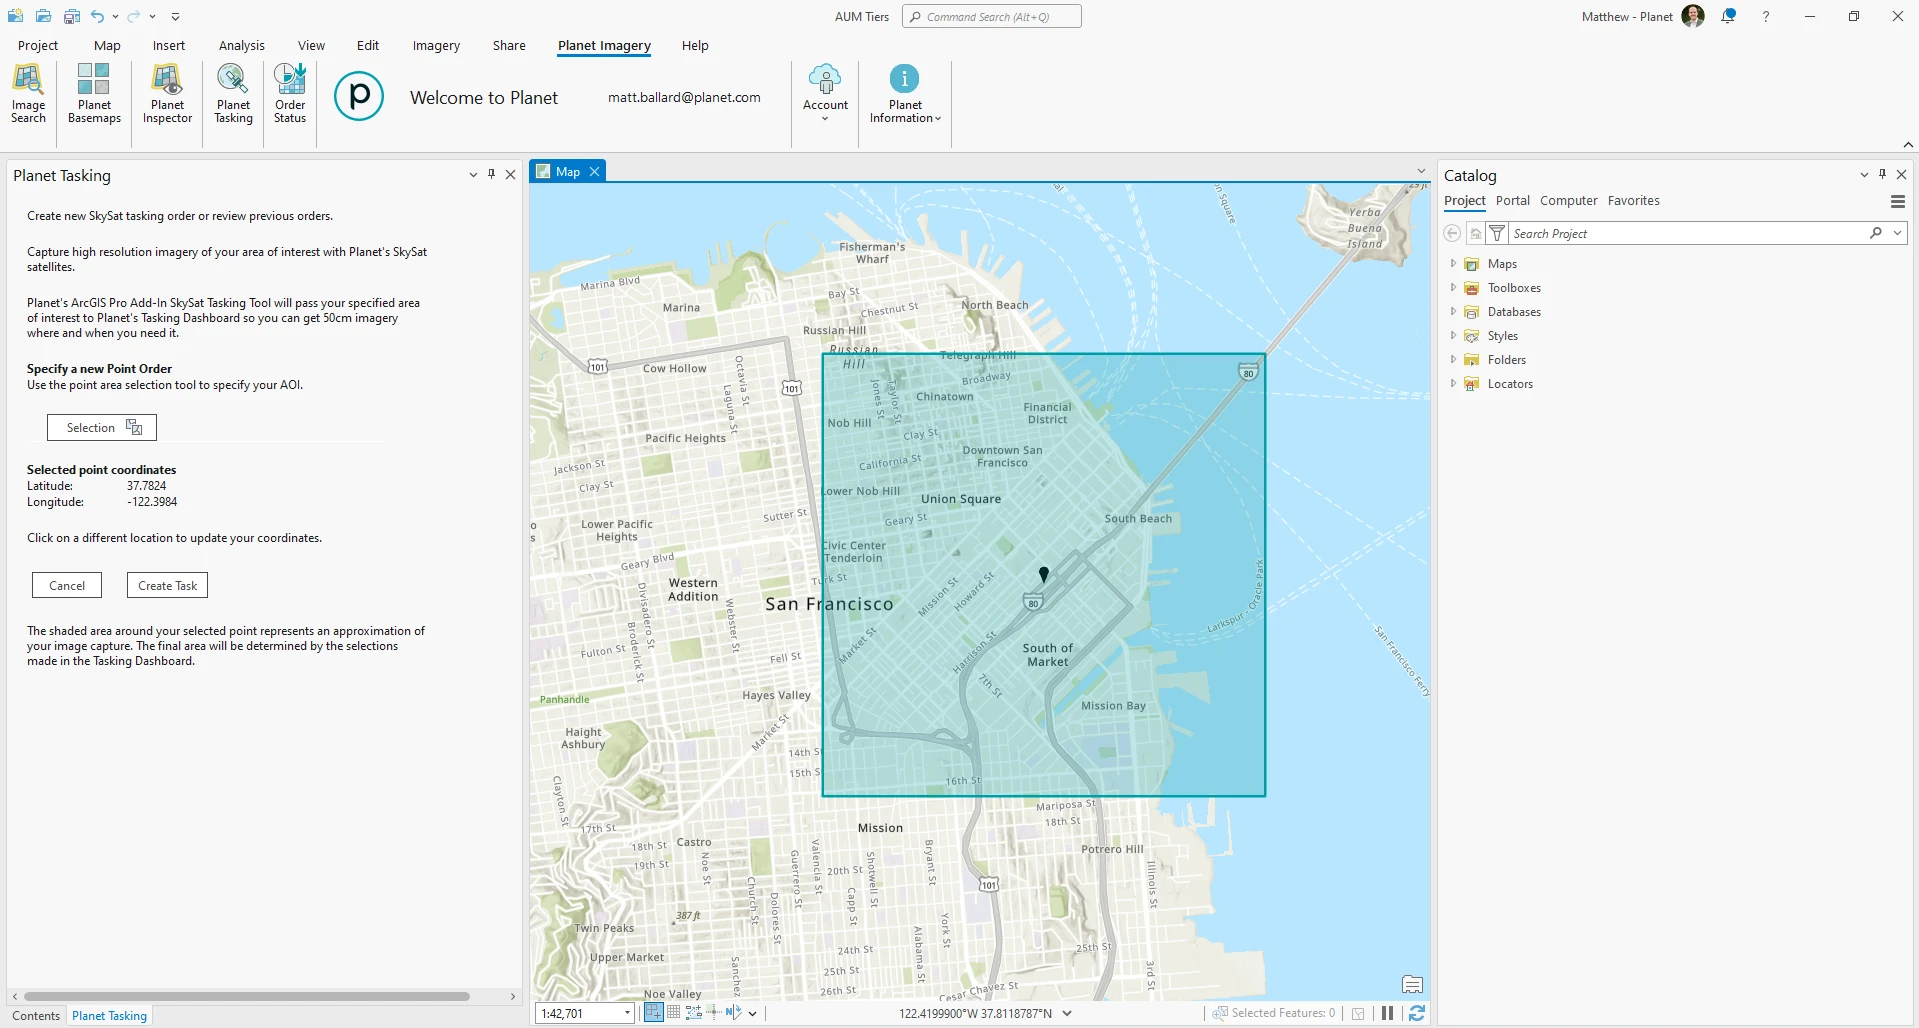
You can use the add-in to identify coordinates to task new high-resolution imagery collection.
This tool will create an area of interest centered around your selected location.
From the Planet Imagery ribbon, open the Planet Tasking panel
In the Tasking Panel, click on Selection and then click a location on your map
Select Create Task and this will open a new browser window
This will redirect you to the Tasking Dashboard with the coordinates preloaded where you can then complete your tasking order. Please refer to tasking documentation to complete the workflow.
To create a high-resolution tasking order, your account must have a tasking plan.