Use OGC Services with ArcGIS
Planet provides seamless options to integrate its imagery into GIS workflows through Basemap and Scene Tiles or OGC (Open Geospatial Consortium) Services.
- Basemap and Scene Tiles: Pre-processed, ready-to-use tile layers ideal for visualization. These include curated mosaics or individual scenes and are supported via WMTS and XYZ protocols.
- OGC Services: Industry-standard protocols like WMS and WMTS enable dynamic data querying and analysis for advanced geospatial applications.
Using Planet Tile Services in ArcGIS Online
Planet Basemaps can be added to ArcGIS Online using WMTS or XYZ protocols.
Supported Protocols
- WMTS (Web Map Tile Service)
- XYZ Tile Service
For additional details, see the Tile Services Overview.
Adding a WMTS Layer to ArcGIS Online
WMTS URL Structure
https://api.planet.com/basemaps/v1/mosaics/wmts
Steps
-
Open ArcGIS Online Map Viewer and navigate to Add Layer from URL.
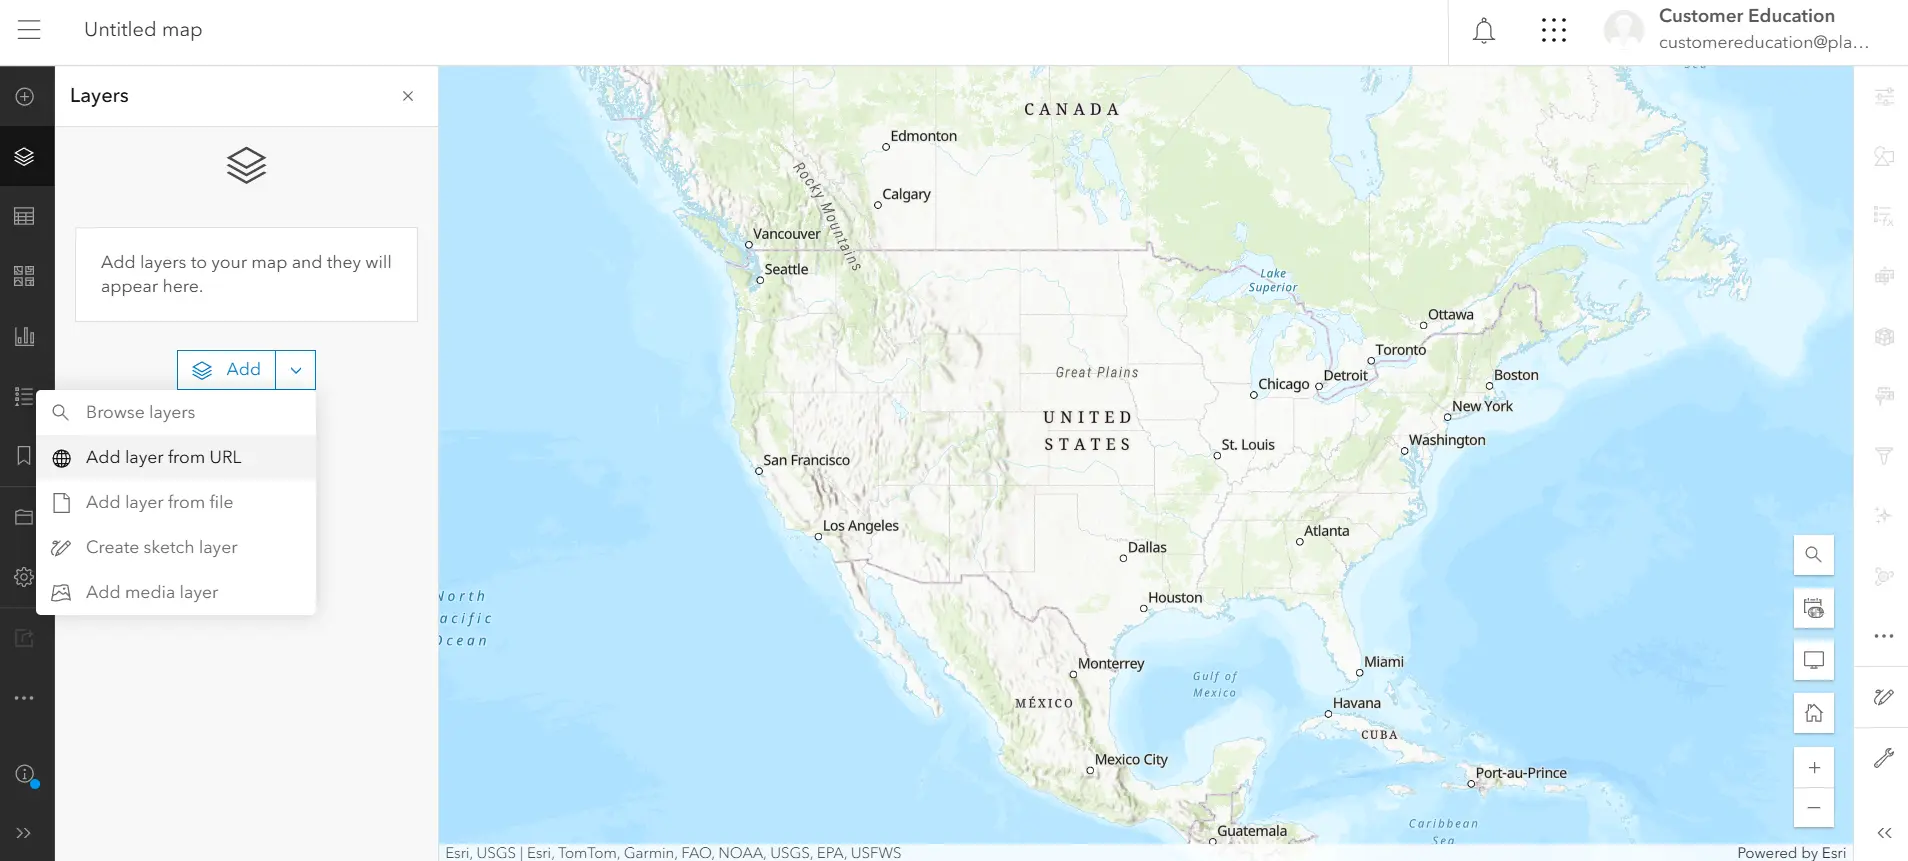
-
Select WMTS OGC Web Service from the dropdown menu.
-
Enter the WMTS base URL (without the
api_key):
https://api.planet.com/basemaps/v1/mosaics/wmts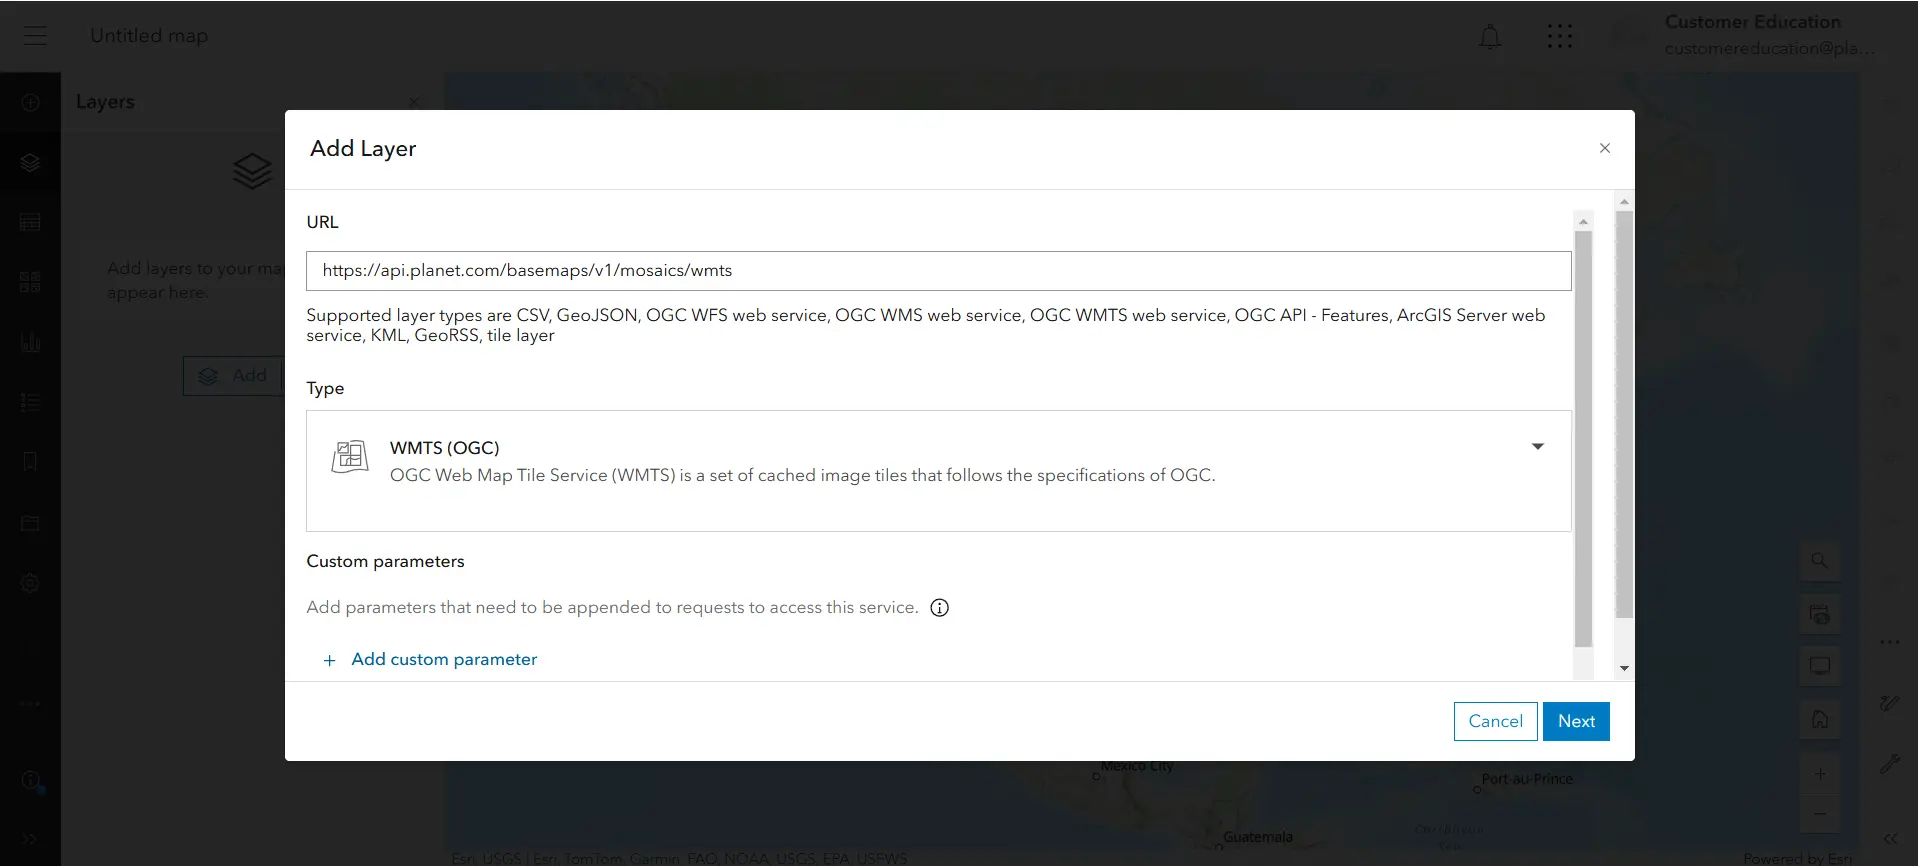
-
Click Add Custom Parameters and enter:
- Parameter:
api_key - Value:
[Your API Key]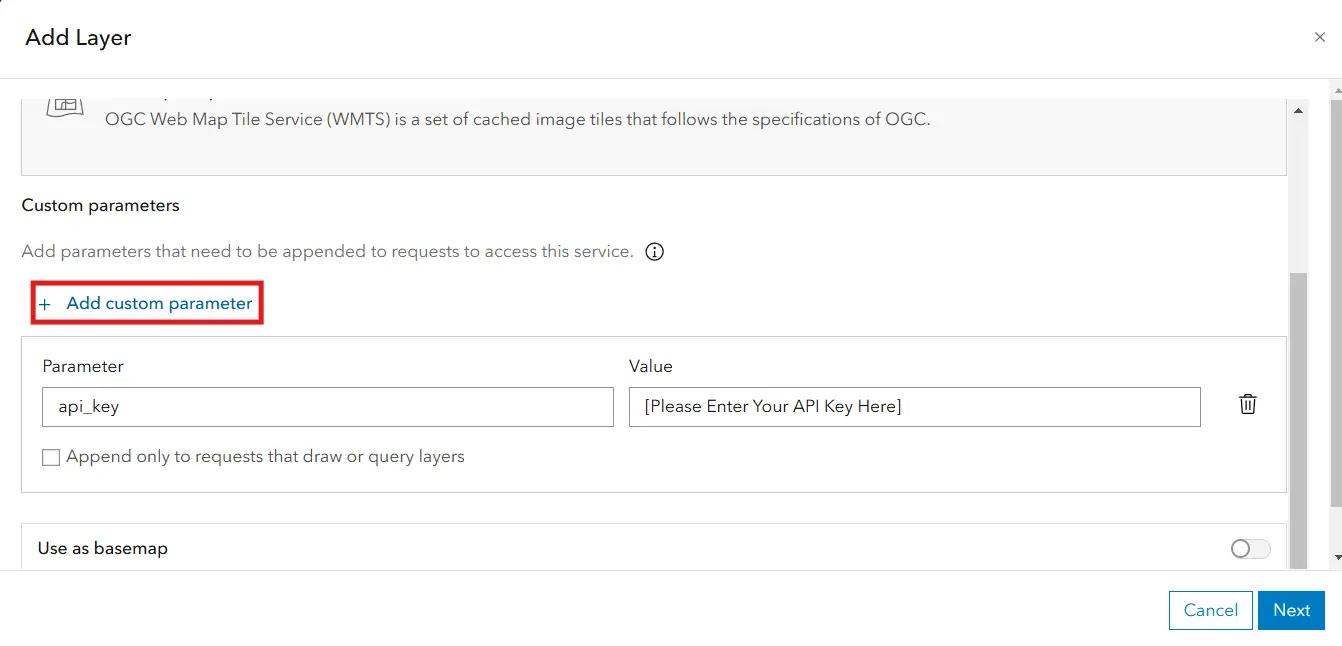
- Parameter:
-
Select the desired basemap and click Add to map.
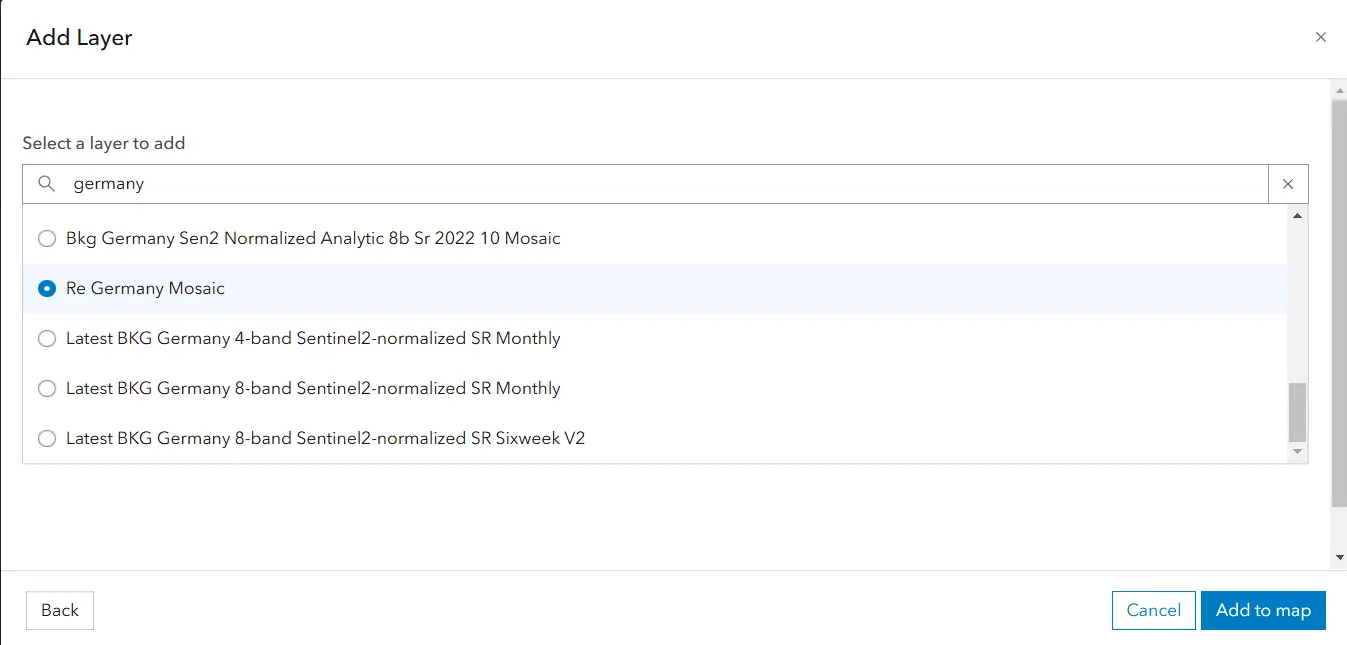
-
The basemap is now added and displayed in the Map Viewer.

Adding an XYZ Layer to ArcGIS Online
XYZ URL Structure for Mosaics
https://tiles{0-3}.planet.com/basemaps/v1/planet-tiles/{mosaic_name}/gmap/{level}/{col}/{row}.png?api_key={api-key}
Steps
-
Open ArcGIS Online Map Viewer and navigate to Add Layer from URL.
-
Enter the full XYZ URL, including the
api_keyand the mosaic name. For example:https://tiles1.planet.com/basemaps/v1/planet-tiles/global_monthly_2019_12_mosaic/gmap/{level}/{col}/{row}.png?api_key=[Your API Key]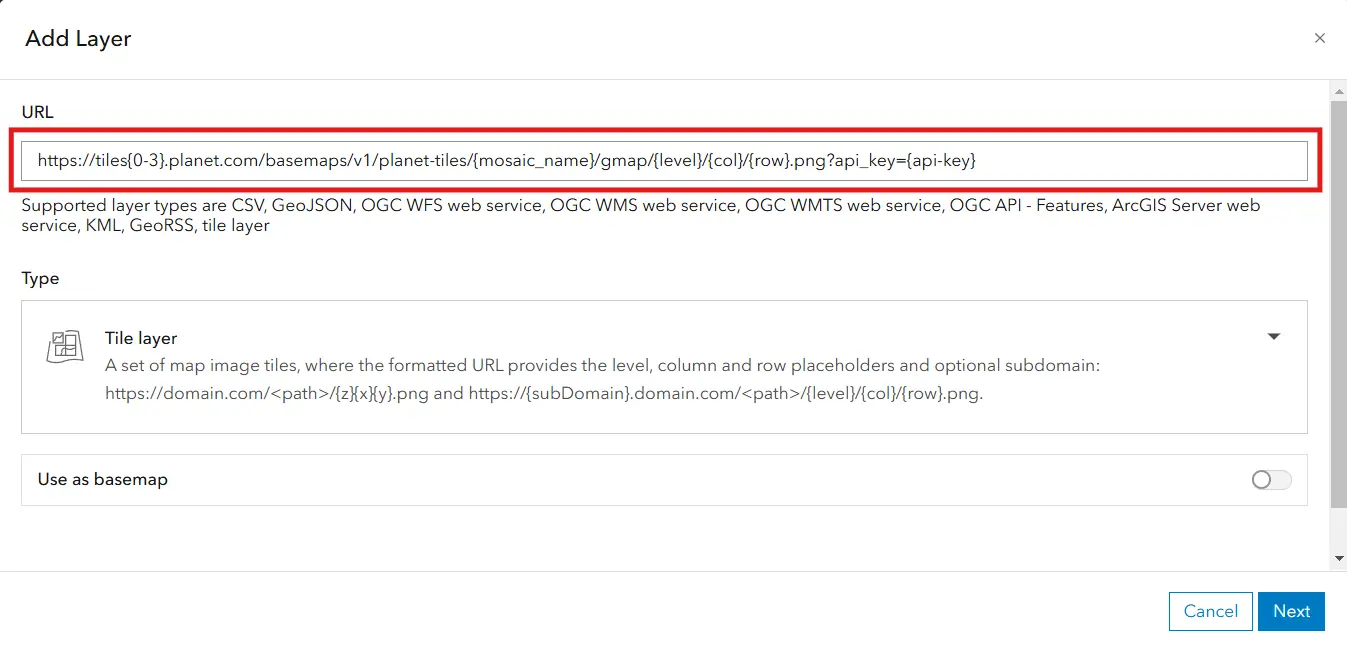
-
Click Next and enter the Title (mosaic_name) and Attribution.
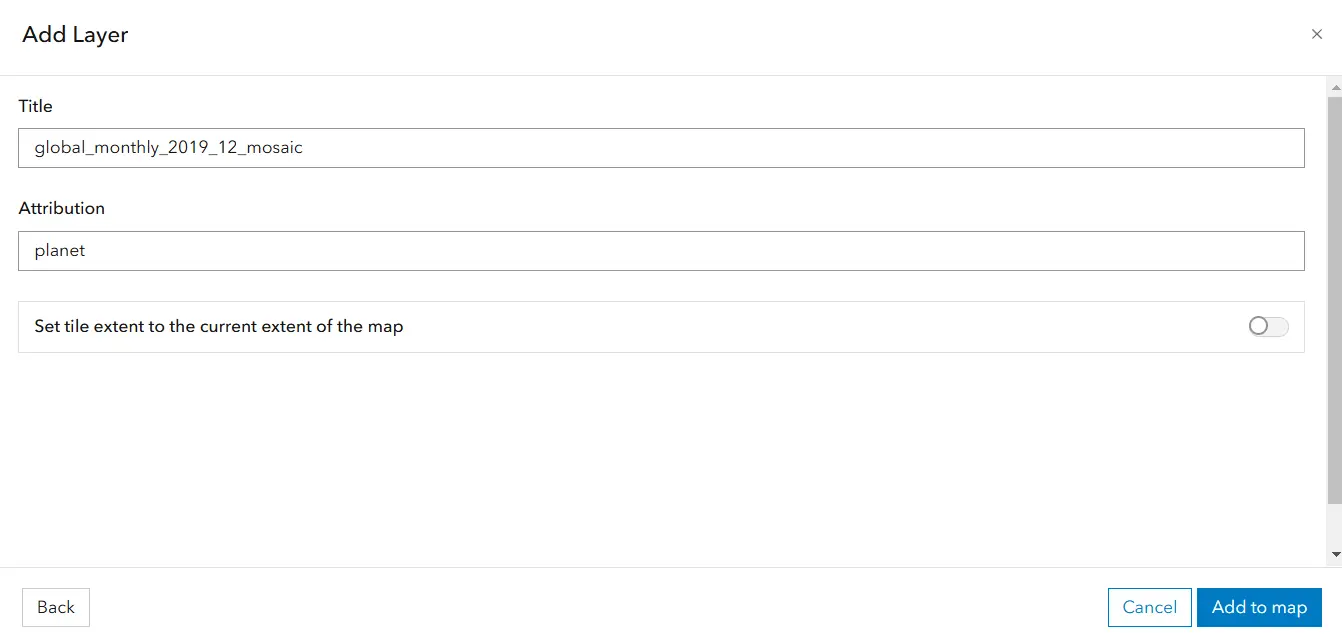
-
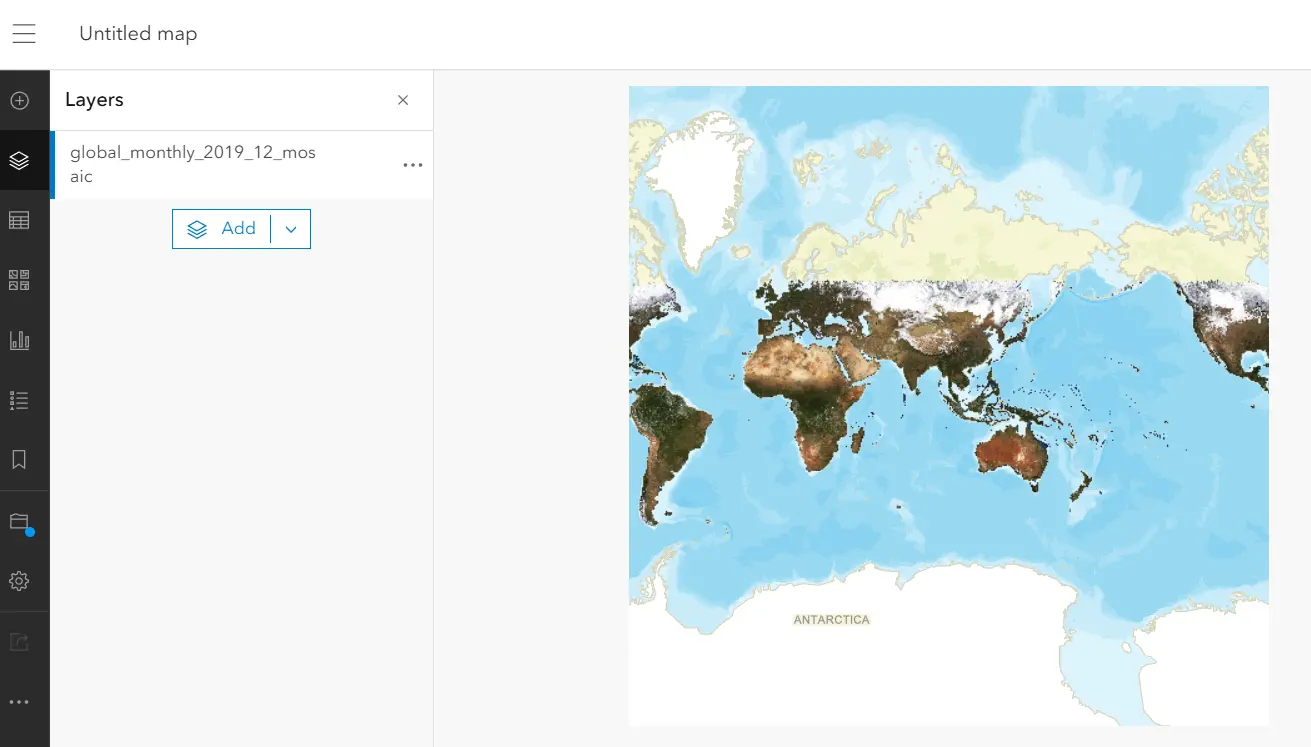
Click Add to map and you will see the XYZ Tile Layer added to the map.
XYZ URL Structure for Individual Scenes
Use the following URL structure to load individual scenes:
https://tiles{0-3}.planet.com/data/v1/{item_type}/{item_id}/{level}/{col}/{row}.png?api_key={api-key}
To view multiple scenes, include a comma separated list of item IDs in the URL. For example:
https://tiles{0-3}.planet.com/data/v1/PSScene3Band/20200516_171114_50_2271,20200516_171112_30_2271/{level}/{col}/{row}.png?api_key=[Your API Key]
Overzooming in ArcGIS Online
To zoom beyond the default resolution of basemaps, add the zmax parameter to your URL. For example:
https://api.planet.com/basemaps/v1/series/431b62a0-eaf9-45e7-acf1-d58278176d52/wmts?zmax=3
Then, click Add Custom Parameters and enter:
- Parameter:
api_key - Value:
[Your API Key]
Using WMS in ArcGIS Online with the OGC API
OGC API WMS (Web Map Service) layers can be added to ArcGIS Online for visualization and analysis.
Steps to Configure WMS in ArcGIS Online
-
Open ArcGIS Online
- Navigate to ArcGIS Online and sign in.
- If you don’t have an account, you can create one.
-
Access the Map Viewer
- Once logged in, click on Map in the top navigation bar to open the world map interface.
-
Add a Layer from the URL
- Open ArcGIS Online Map Viewer and navigate to Add Layer from URL.
- Open ArcGIS Online Map Viewer and navigate to Add Layer from URL.
-
Retrieve Your WMS URL
-
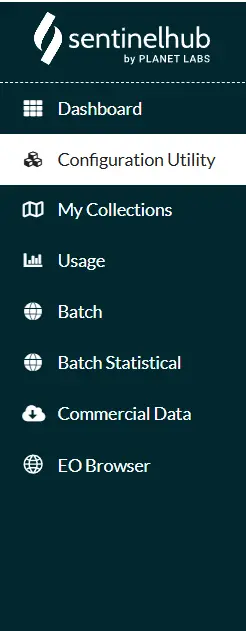
Go to the Configuration Utility in the Dashboard application.
-
Open (or create a new configuration) the configuration you want to display in ArcGIS Online.
-
In the left-hand dropdown menu of the Configuration Utility, select WMS.
-
Copy the WMS endpoint, which will look like this:
https://services.sentinel-hub.com/ogc/wms/{Instance_ID} -
Replace
{Instance_ID}with your specific instance ID.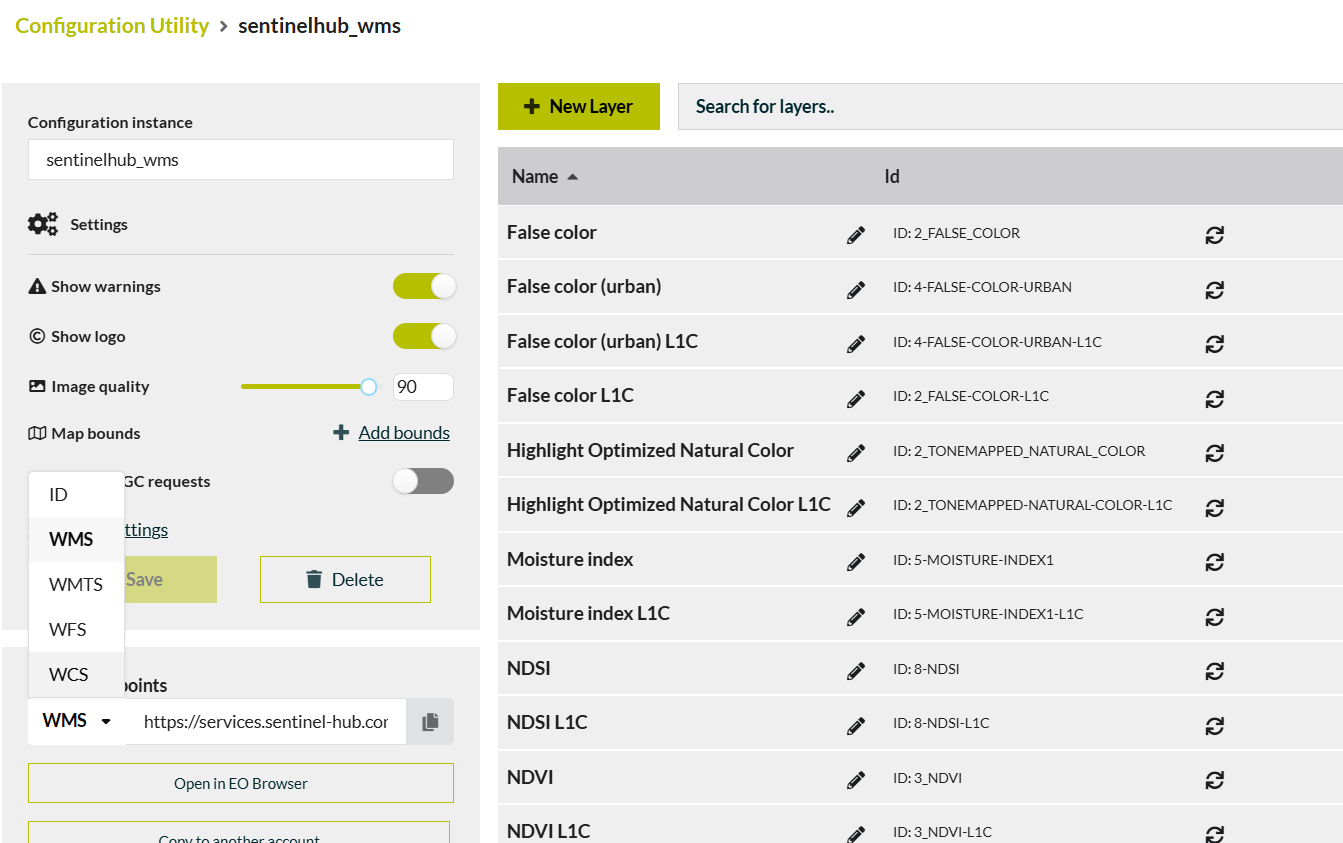
-
-
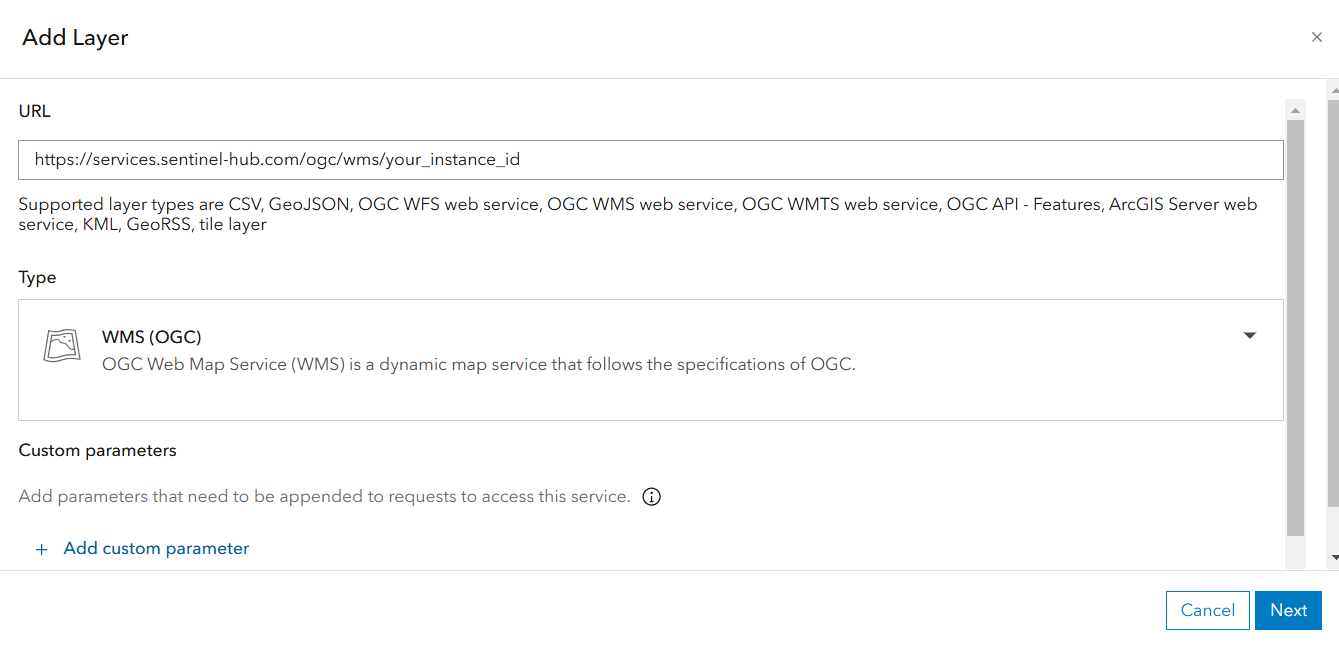
Add the WMS URL to ArcGIS Online
-
Paste the WMS URL into the URL field in the Add Layer from URL dialog.
-
Click Next to fetch the available layers.
-
-
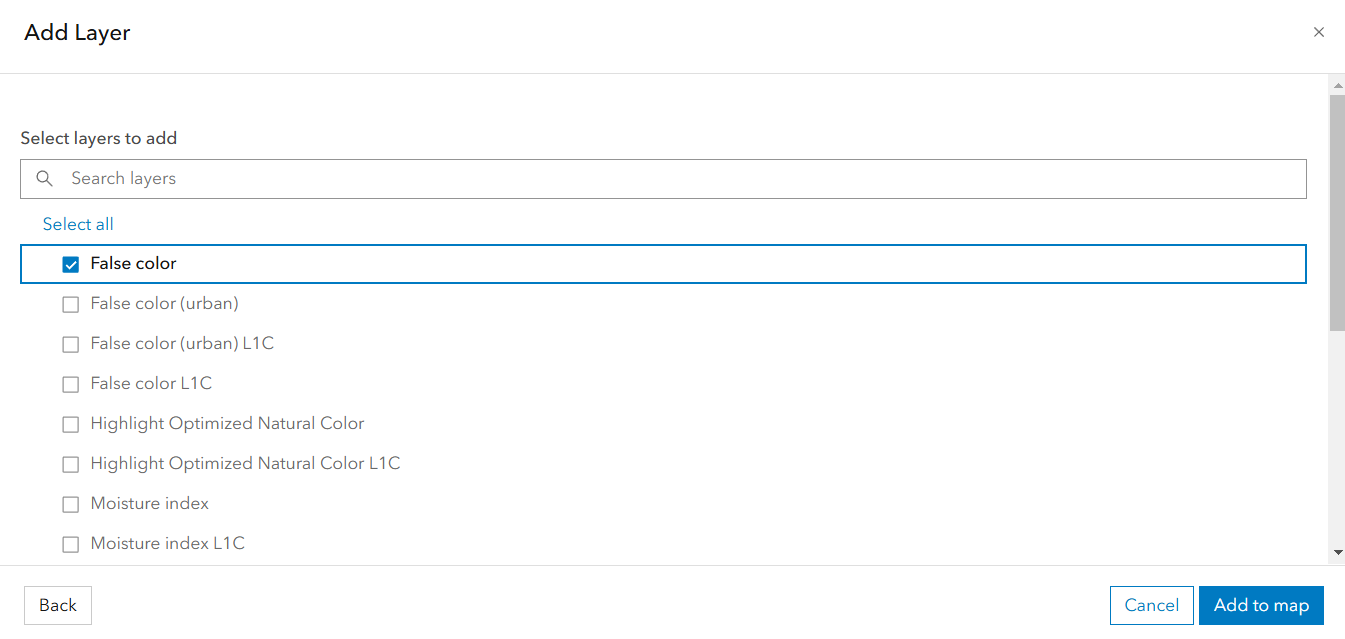
Select Layers to Add
-
After you click Next, a list of layers available in your OGC API configuration appear.
-
By default, no layers will be selected. Choose the layers you want to display by selecting them individually.
-
Click Add to map once you make your selection.
-
-
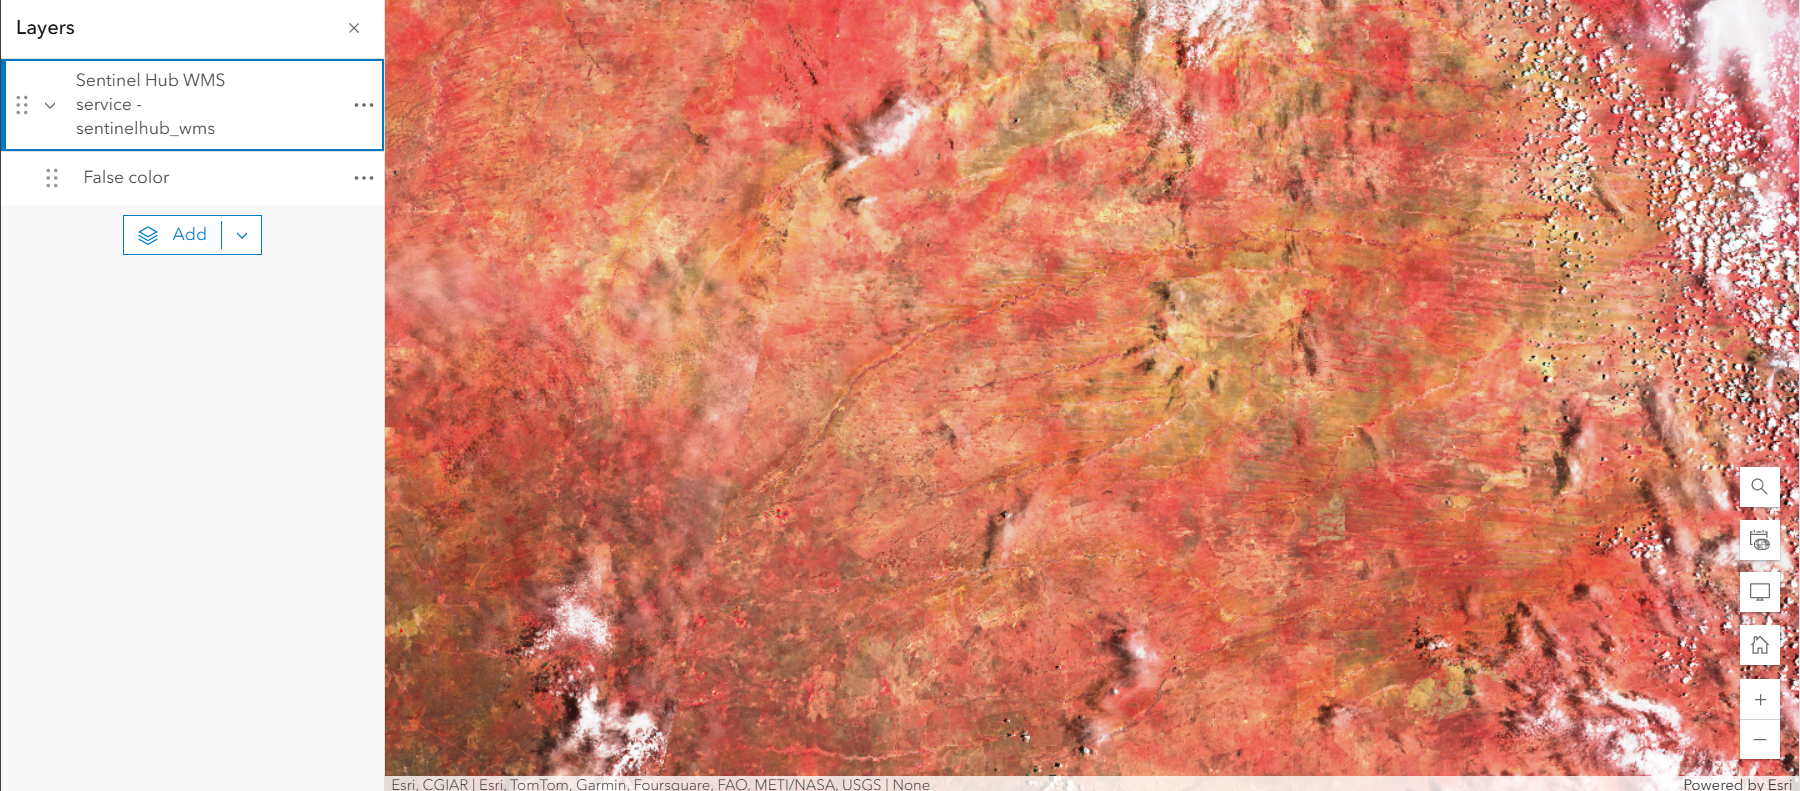
View and Interact with Layers
-
The added configuration appears in the Layers panel on the left.
-
Expand the configuration to reveal its layers.
-
Select a layer and zoom in to view the imagery. Layers may not display if you are not zoomed in sufficiently.
-
Using WMS in ArcGIS Online with the OGC API
OGC API WMS (Web Map Service) layers can be added to ArcGIS Online for visualization and analysis.
Steps to Configure WMS in ArcGIS Pro
-
Open ArcGIS Pro
-
Launch ArcGIS Pro and open an existing project or create a new one.
-
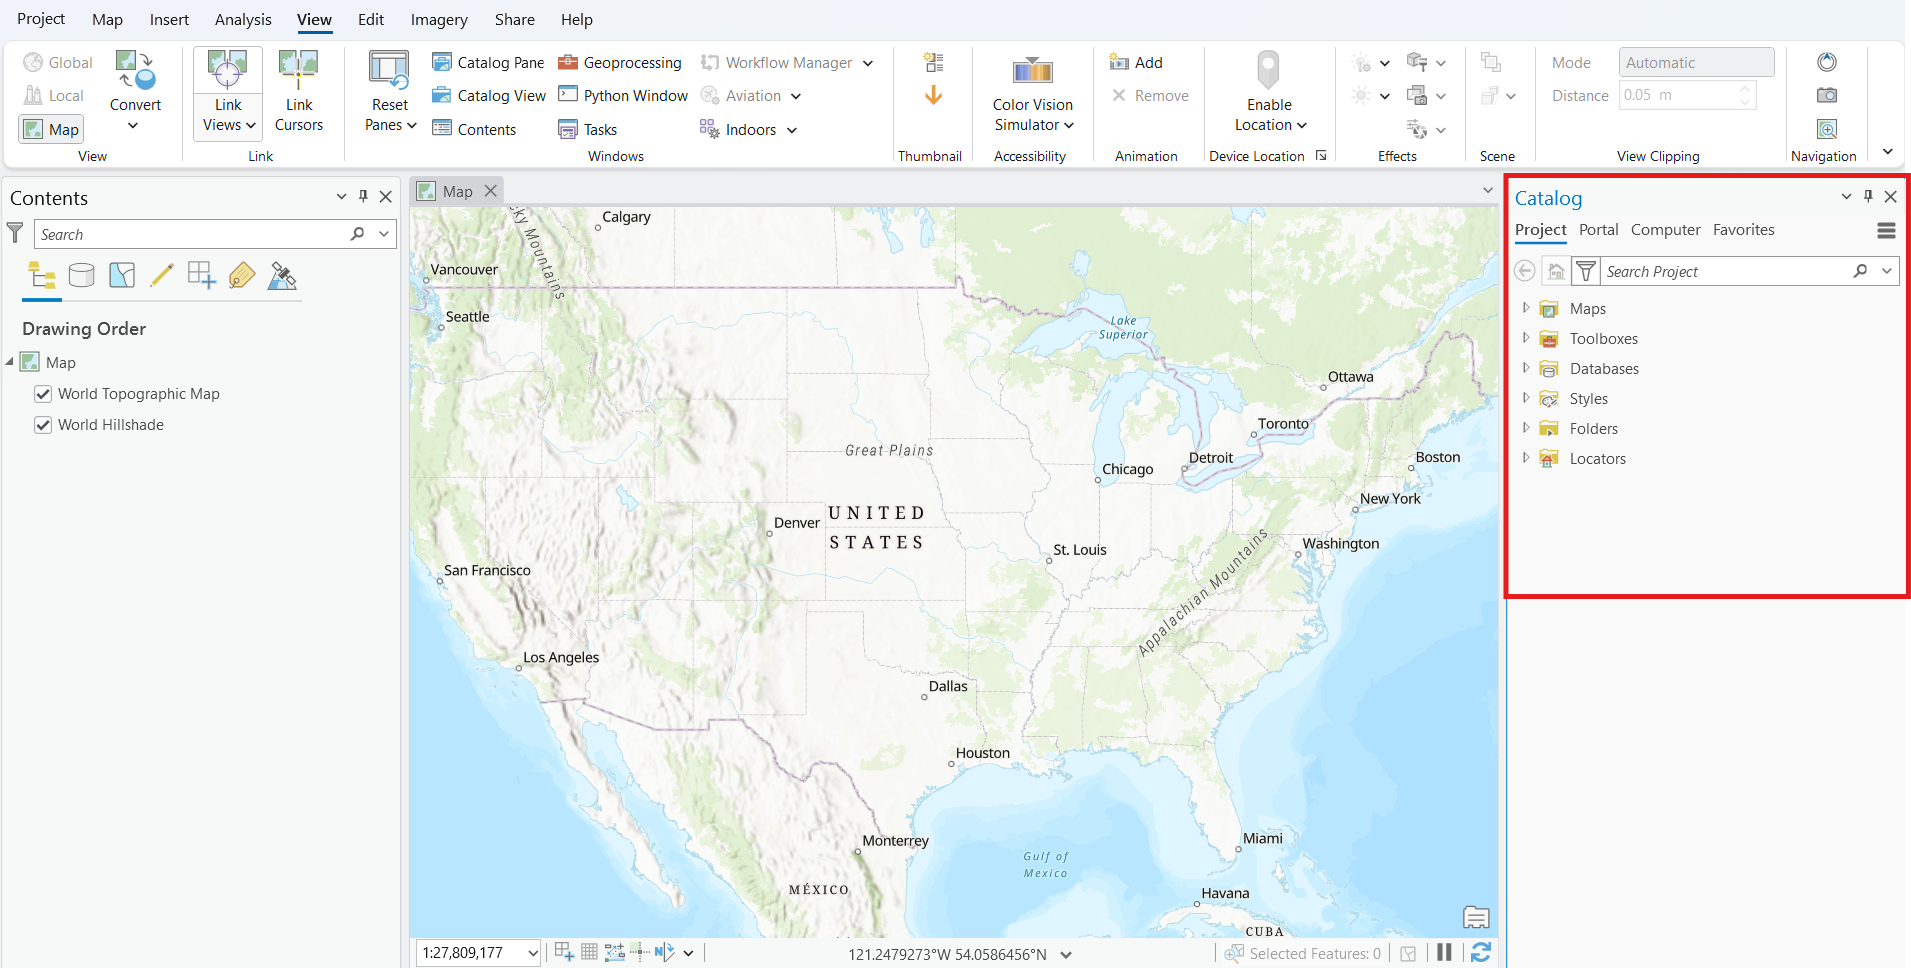
Navigate to the Catalog pane on the right. If it’s not visible, enable it by going to View > Catalog Pane.
-
-
Add a WMS Connection
-
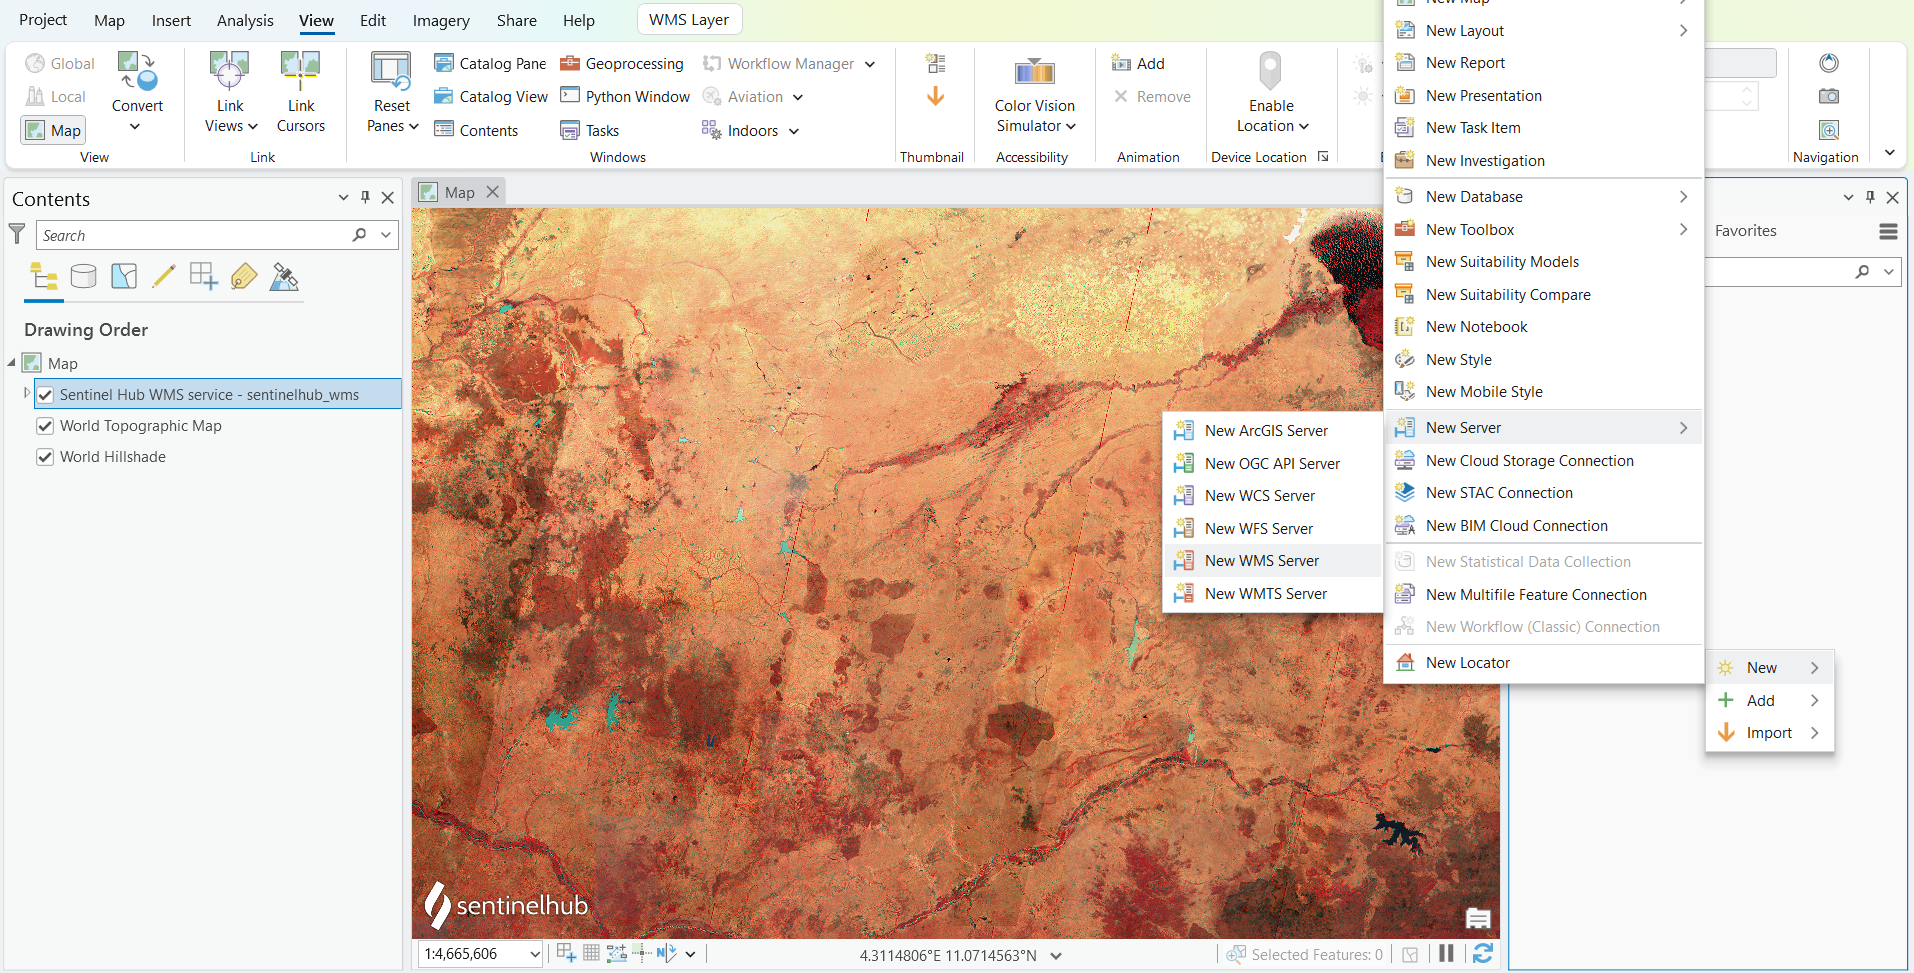
In the Catalog pane, expand the Project tab and right-click Servers.
-
Select New WMS Server Connection from the context menu.
-
-
Configure the WMS Server
-
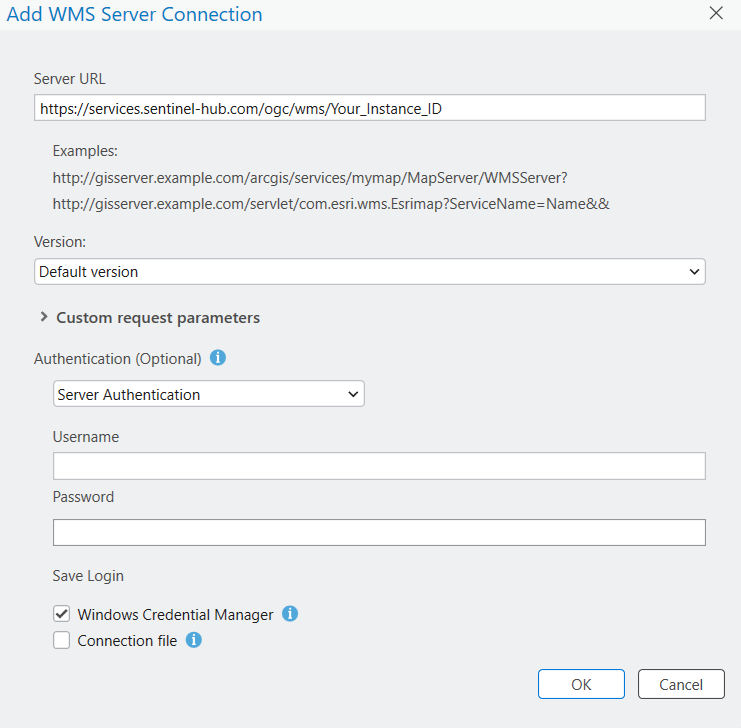
In the Add WMS Server Connection dialog:
- Paste the WMS URL into the URL field:
https://services.sentinel-hub.com/ogc/wms/{Instance_ID}
- Paste the WMS URL into the URL field:
-
Replace
{Instance_ID}with your specific instance ID.
-
Click OK to validate and save the connection. If the URL is correct, the connection will be added under the Servers folder.
-
-
Add Layers to the Map
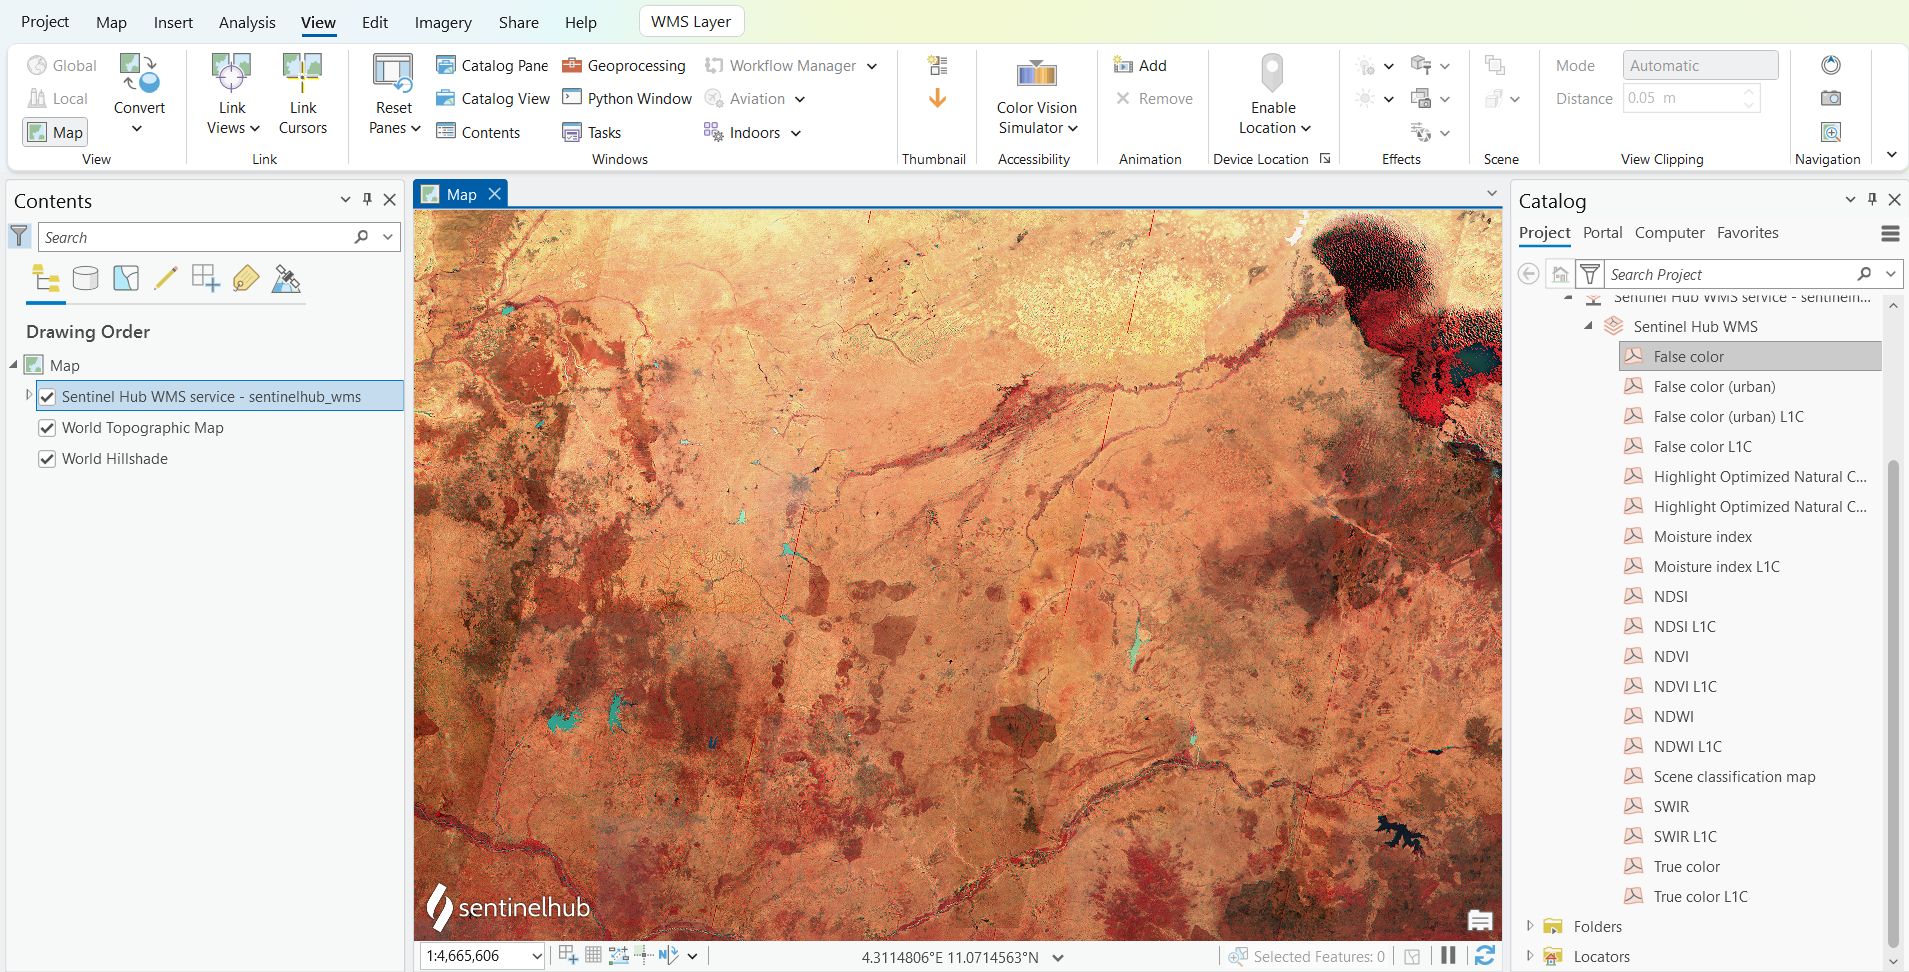
- In the Catalog pane, expand Servers and double-click the newly added WMS connection.
- A list of available layers will appear. Right-click a layer and select Add to Current Map.

-
Customize Layer Visibility
-
Open the Contents pane on the left to view the added layers.
-
To prevent performance issues:
- Turn off all layers by unchecking their boxes.
- Enable layers one by one as needed.
-
Zoom in to the desired area of interest. Layers will not render at scales that are too small.
-