Search and Preview Imagery
The Search and Order tool in Explorer offers the best image discovery, allowing you to search, preview, and order PlanetScope and SkySat imagery.
Setting up Search Parameters
To search for imagery, first specify your Area of Interest (AOI). You can do this by one of the following:
- Searching and interactively panning and zooming on the map location
- Uploading a file (supported files include Shapefile, WKT, GeoJSON, KML, KMZ)
- Accessing your saved AOIs from the Access your areas of interest icon on the left-hand menu
- Draw a shape on the map
You can set additional filters to narrow the search results. You can filter by:
- Date range
- Imagery type (for example, SkySat, PlanetScope)
- Instrument type
- Cloud cover
- Sun elevation
- Spectral bands, Instrument type, and Publishing stage (PlanetScope only)
The search functionality in Explorer is powered by the Data API. To move your workflow from Explorer to a programmatic environment, use the Data API to search for imagery.
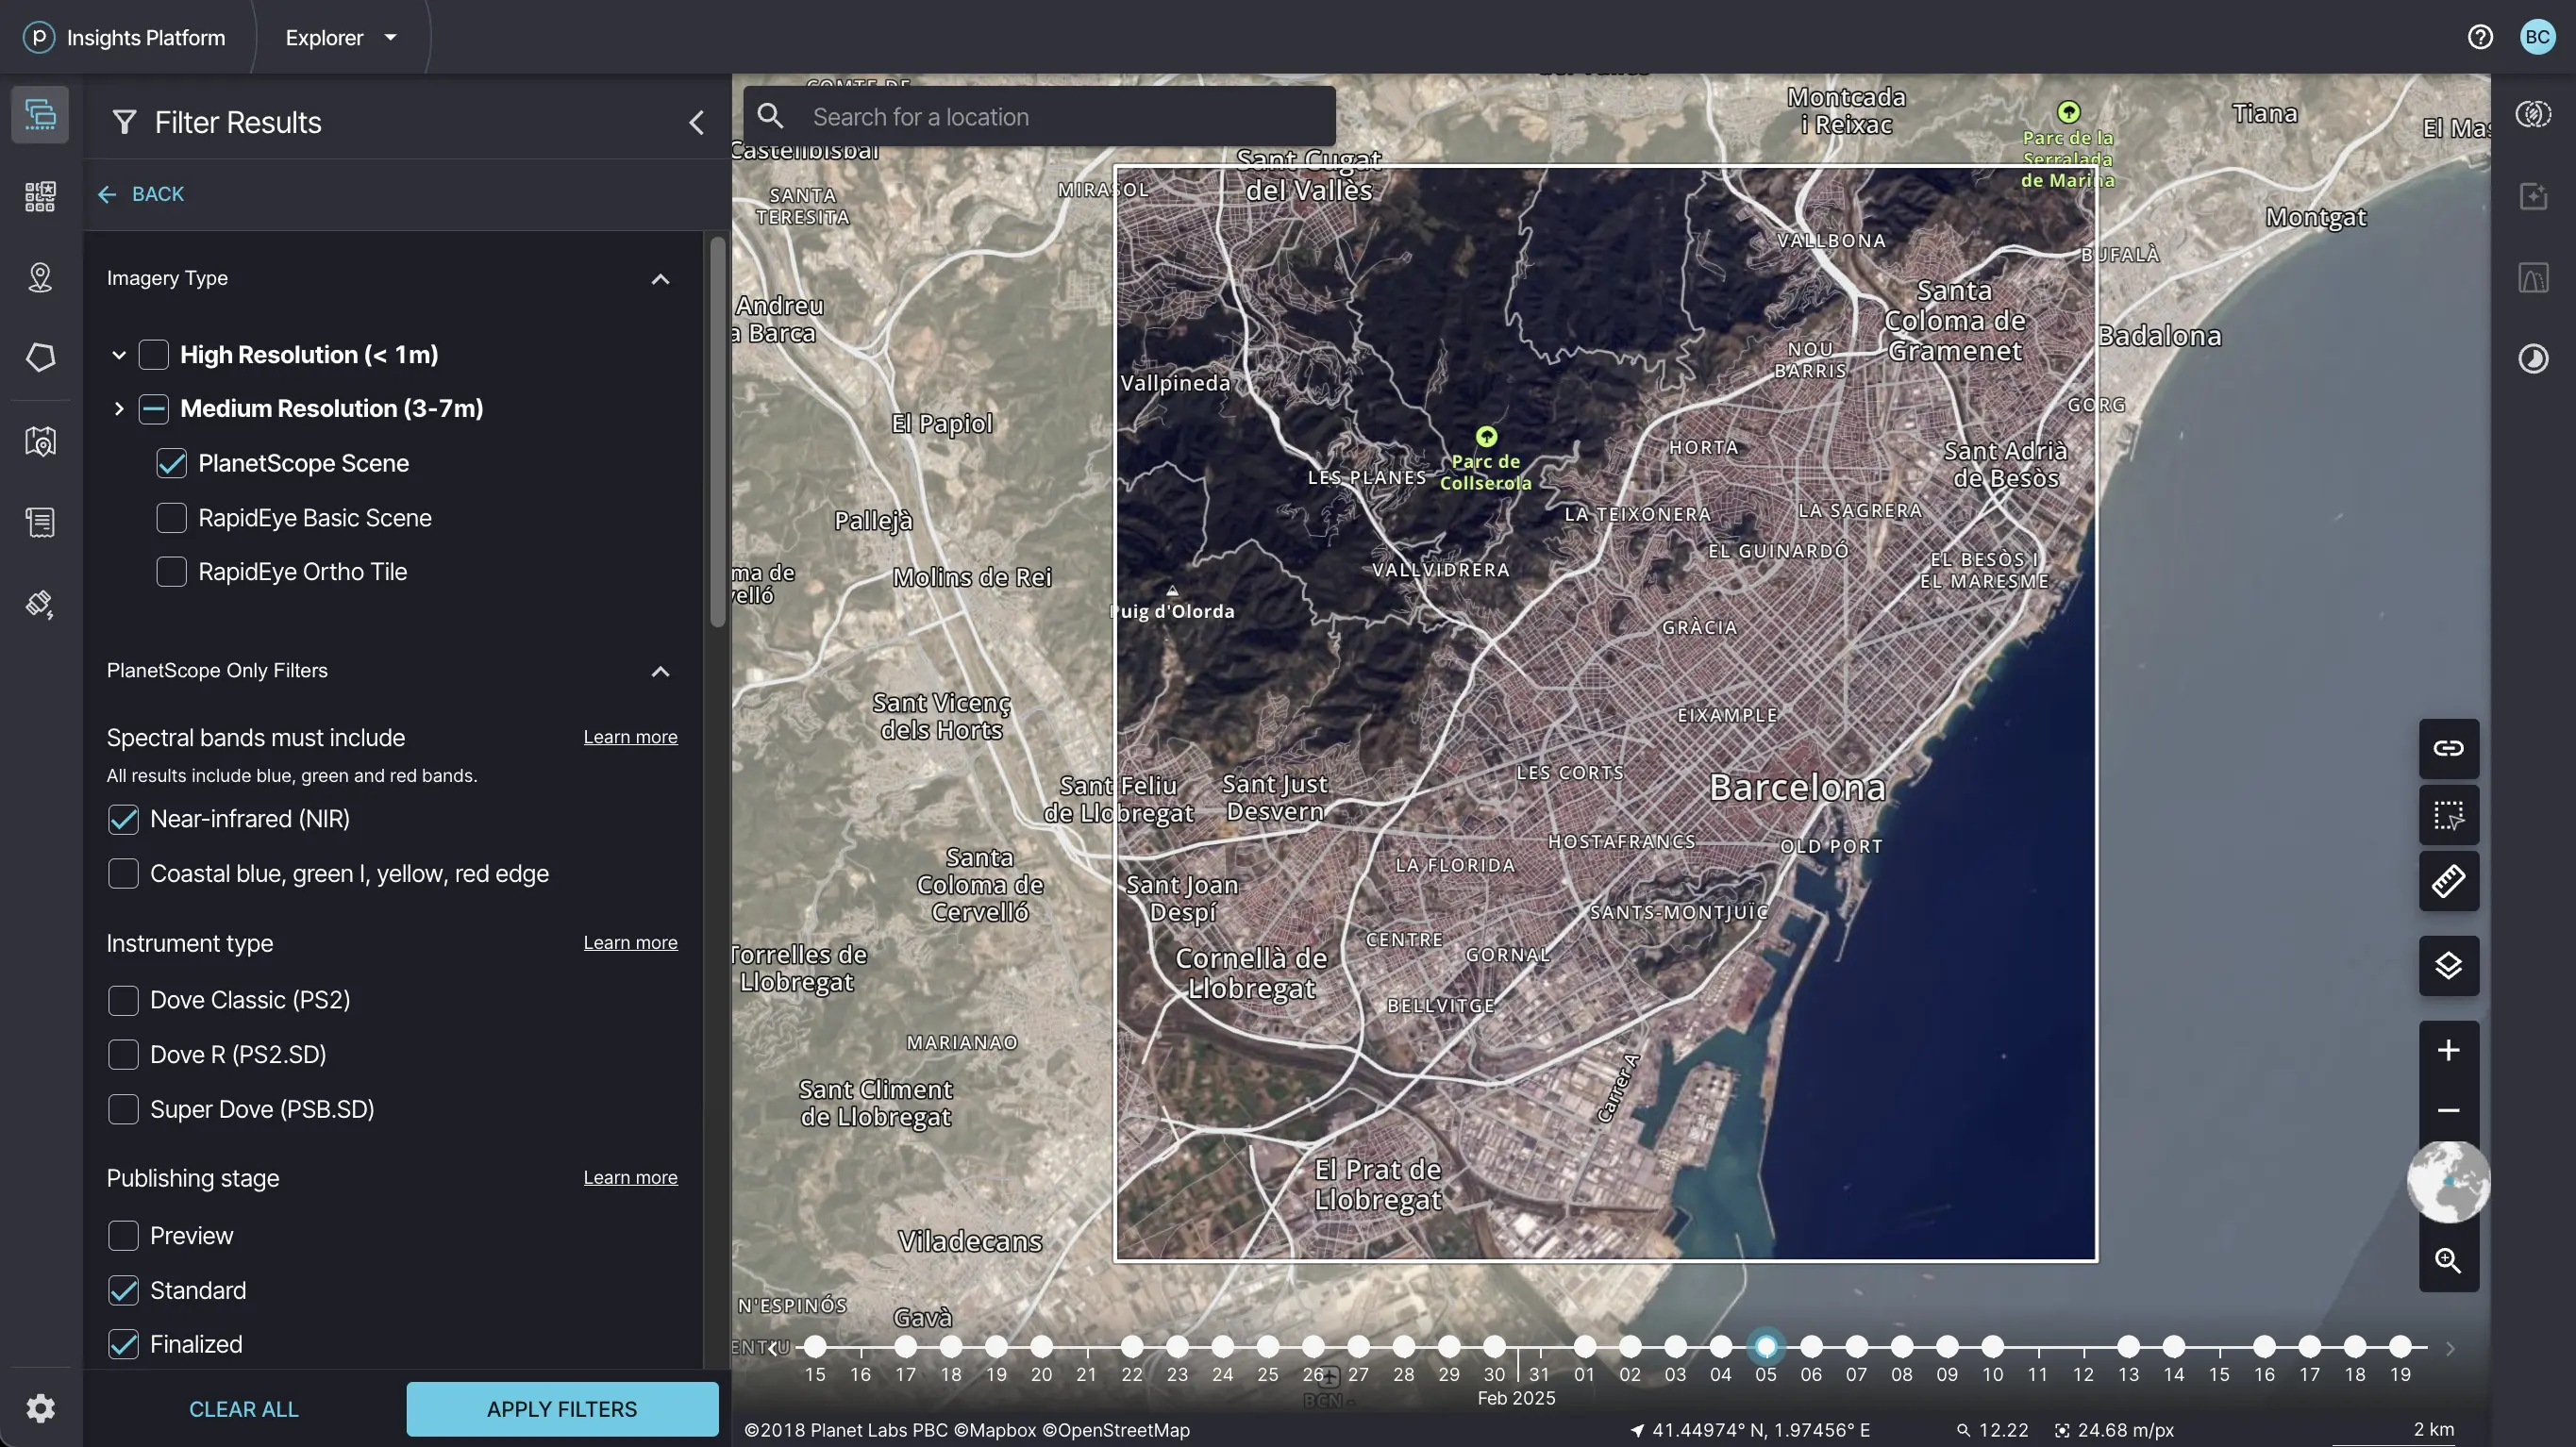
Search for imagery in Planet Explorer using different filters.
Stream Preview Tiles
After a search is executed using Planet Explorer, you can stream preview tiles for your imagery results to quickly view the imagery in your AOI. The preview tiles are a lightweight way to view imagery before ordering or for visual analysis.
To stream preview tiles for your search results, select the “eye” icon on the top right corner of your search result thumbnail.
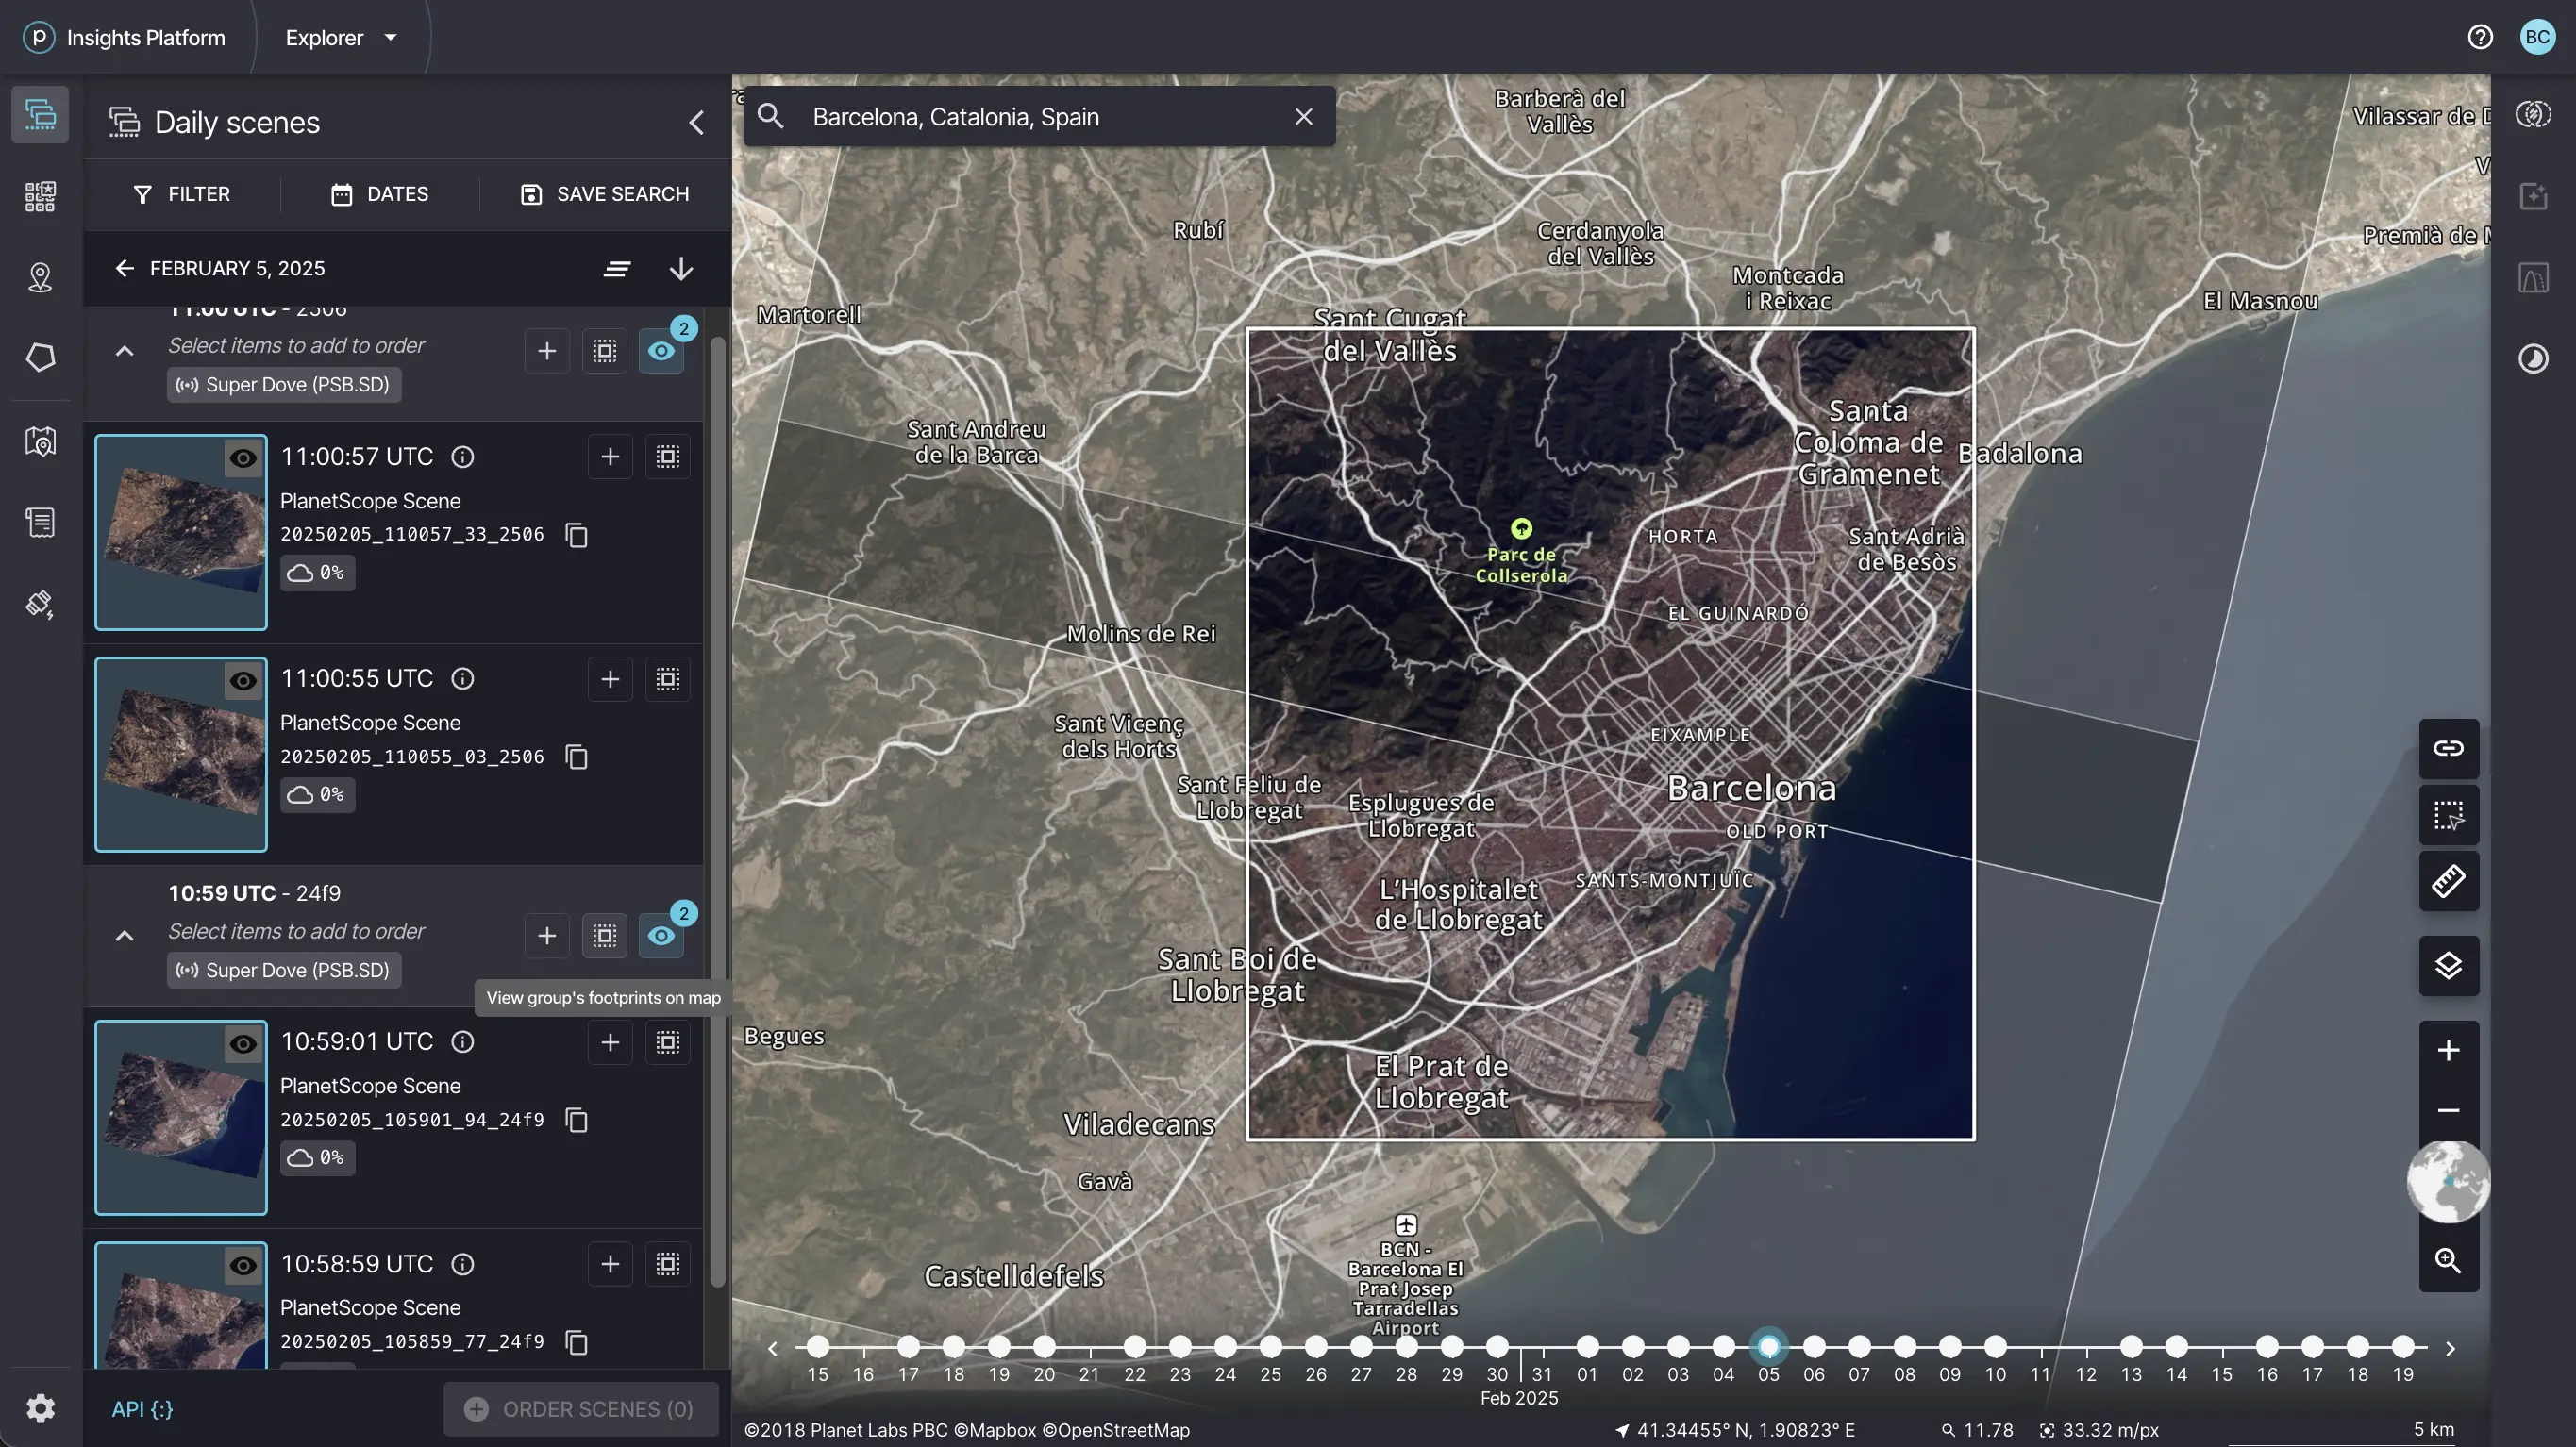
View preview tiles for your search results.
Create a Saved Search
To save your search, complete the following steps.
After you make your selections, the Save Search button appears above the search results.
Save Search. A window appears where you can make additional selections.
Name your search, and make selections under Search Options and Search Parameters. The name of your Saved Search defaults to the text entered into the Search bar.
Under Search Options, enable or disable email notifications and organize your search into a folder. When selecting email notifications, email notifications are enabled when the toggle is teal. When the toggle is grey, the email notifications are disabled. Note: These notifications are not affected by the Date Range Filter you specified, and they only apply to all new imagery within your AOI boundary.
You can create a new folder to organize your searches by clicking Create New Folder, typing a name, and clicking Add. Your search is added to the Folder highlighted in teal.
Under Search Parameters, verify your selected date range or omit an end date for your saved search. If you click No End Date, the most recent imagery in your saved search appears. You can also check other parameters of your saved search. If any of these parameters are incorrect, click the X in the upper right-hand corner and adjust it in the Search panel.
To access the searches that you have saved, click the Saved Search icon below the search icon from the left-hand toolbar.
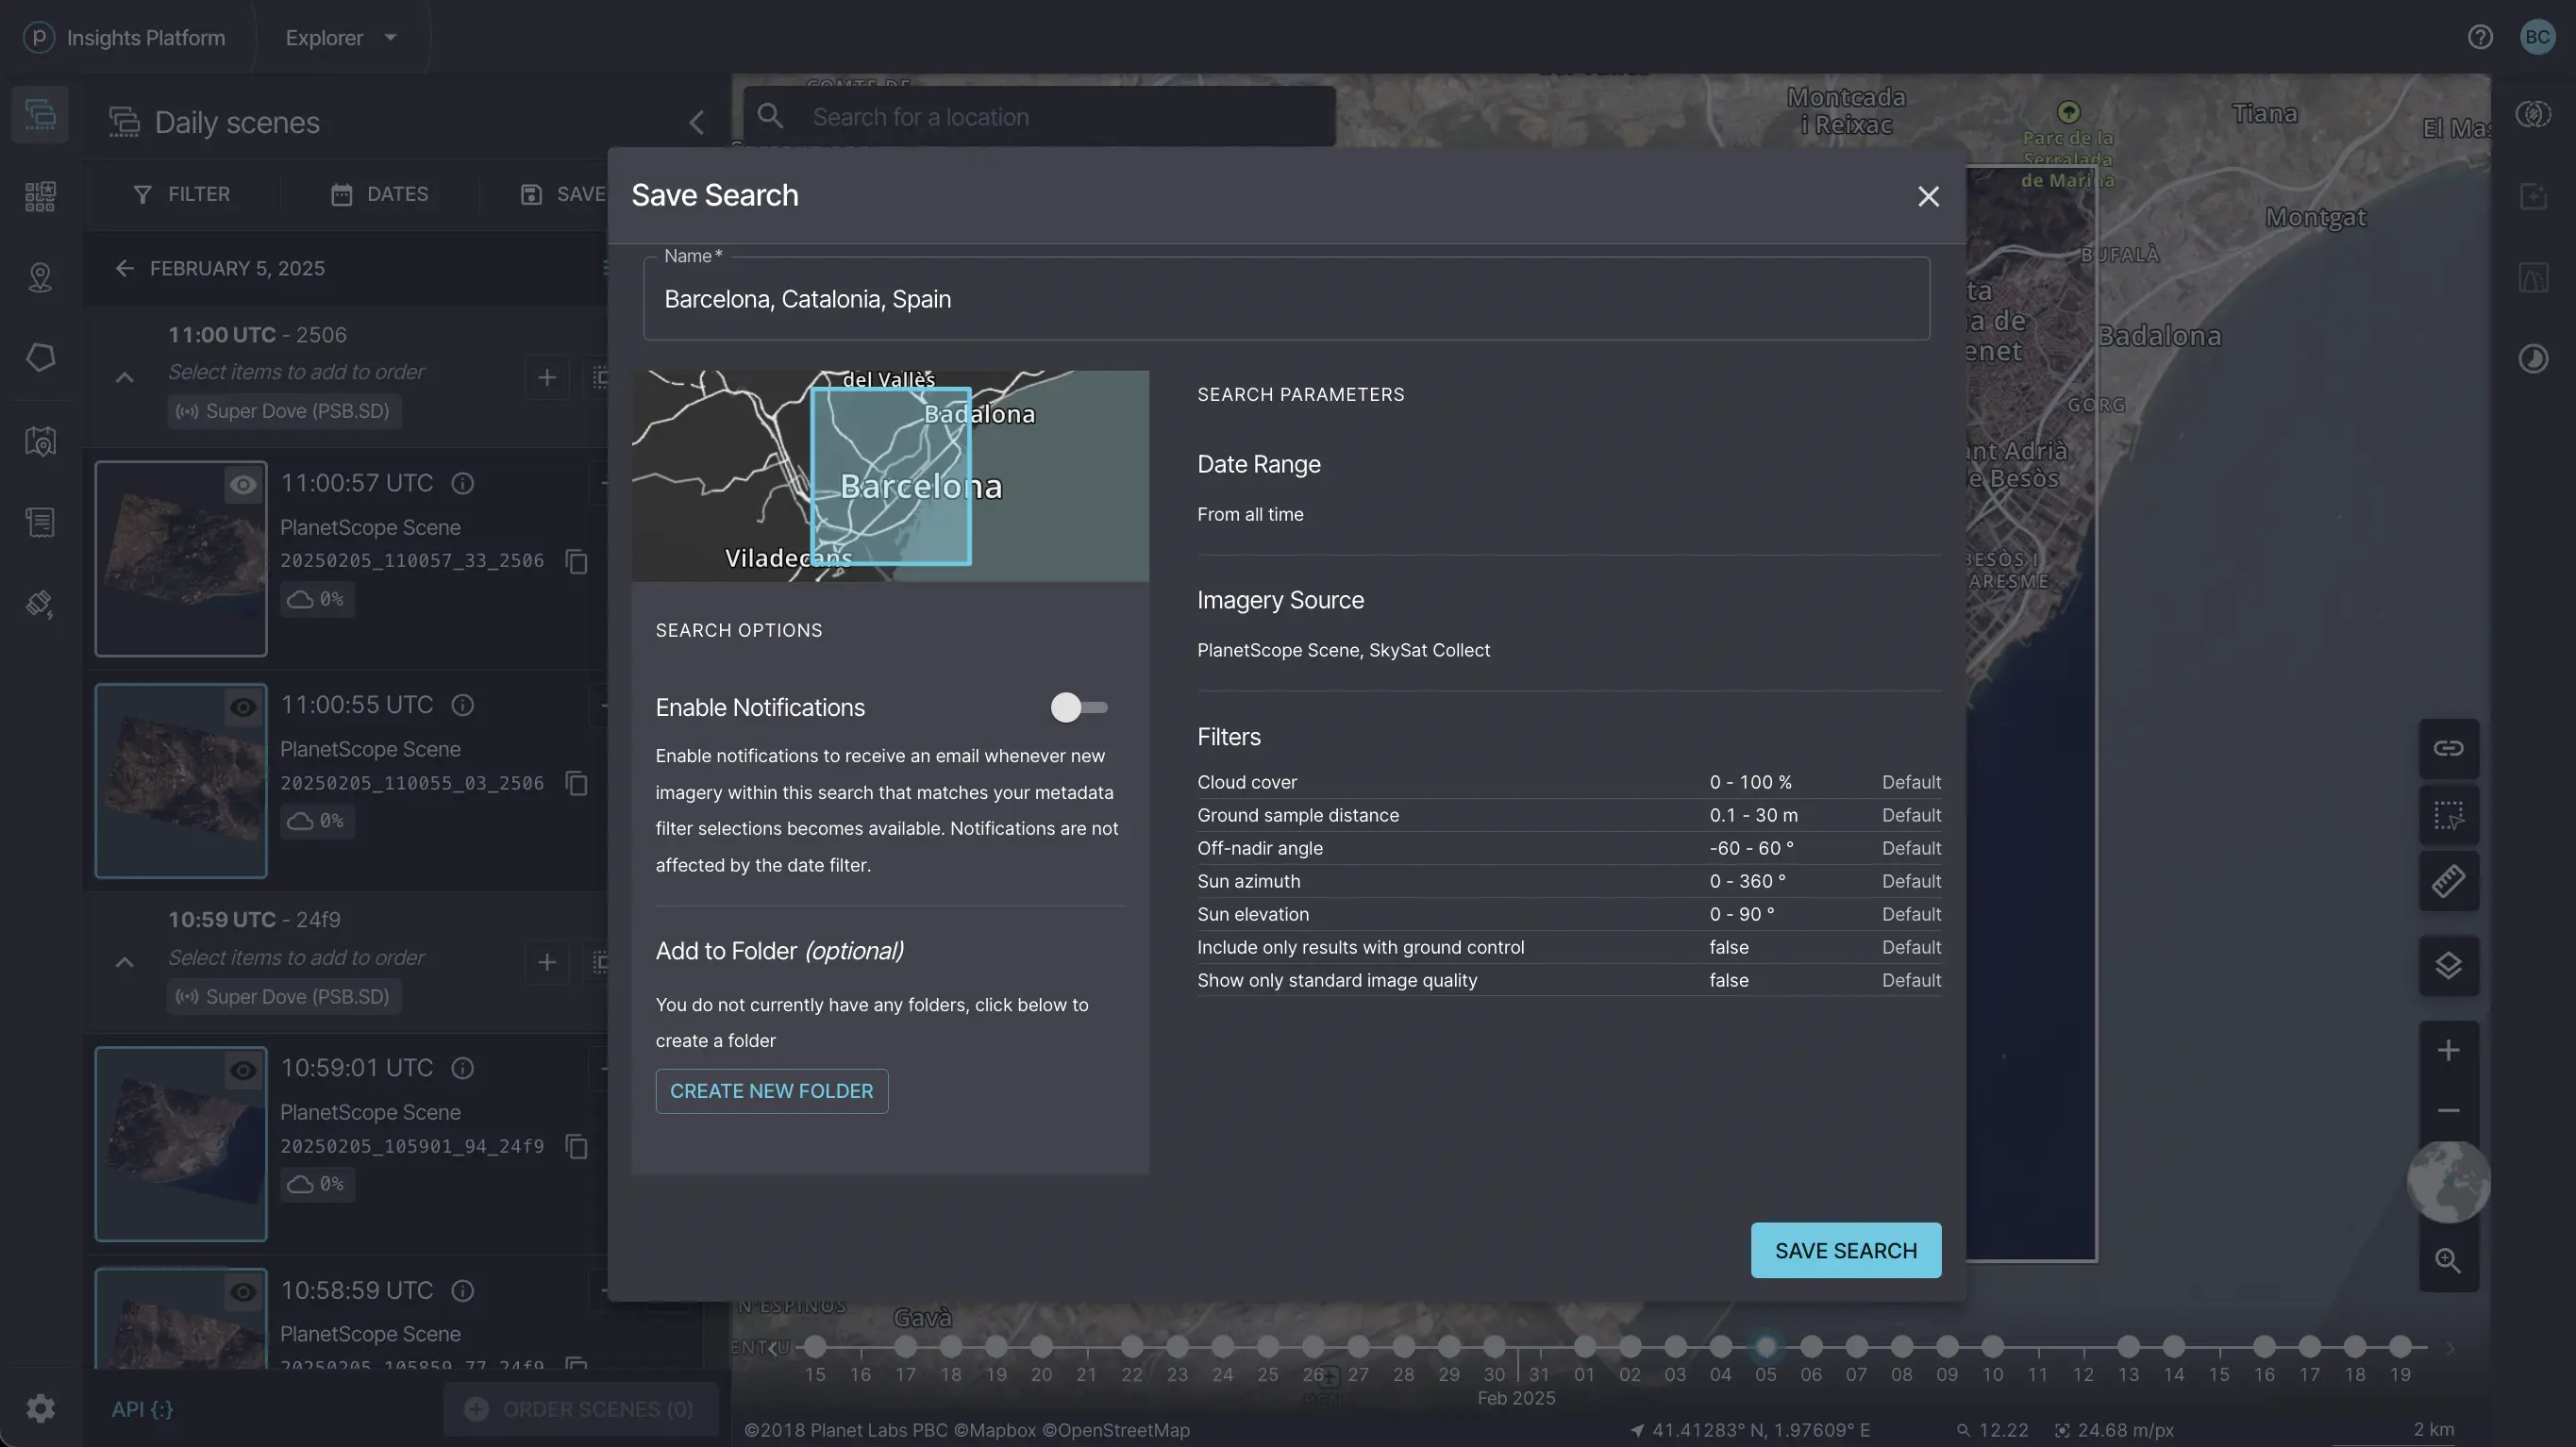
Save your searches to reuse later or monitor for new images.
Compare Imagery
Inspect imagery using visual comparison and analysis tools.
- Slider - The default option selected as you choose the Compare tool. This controls the slider bar, allowing you to view two images stacked atop each other.
- Opacity - The Opacity option displays the top left image and the Opacity slider bar at the bottom of the map view. Slide the Opacity bar to the right, and the top image will fade.
- Relative Luminance - Choose the relative luminance option to view the top left image, along with a threshold range slider bar at the bottom of the map view. This highlights the pixel difference between both images.
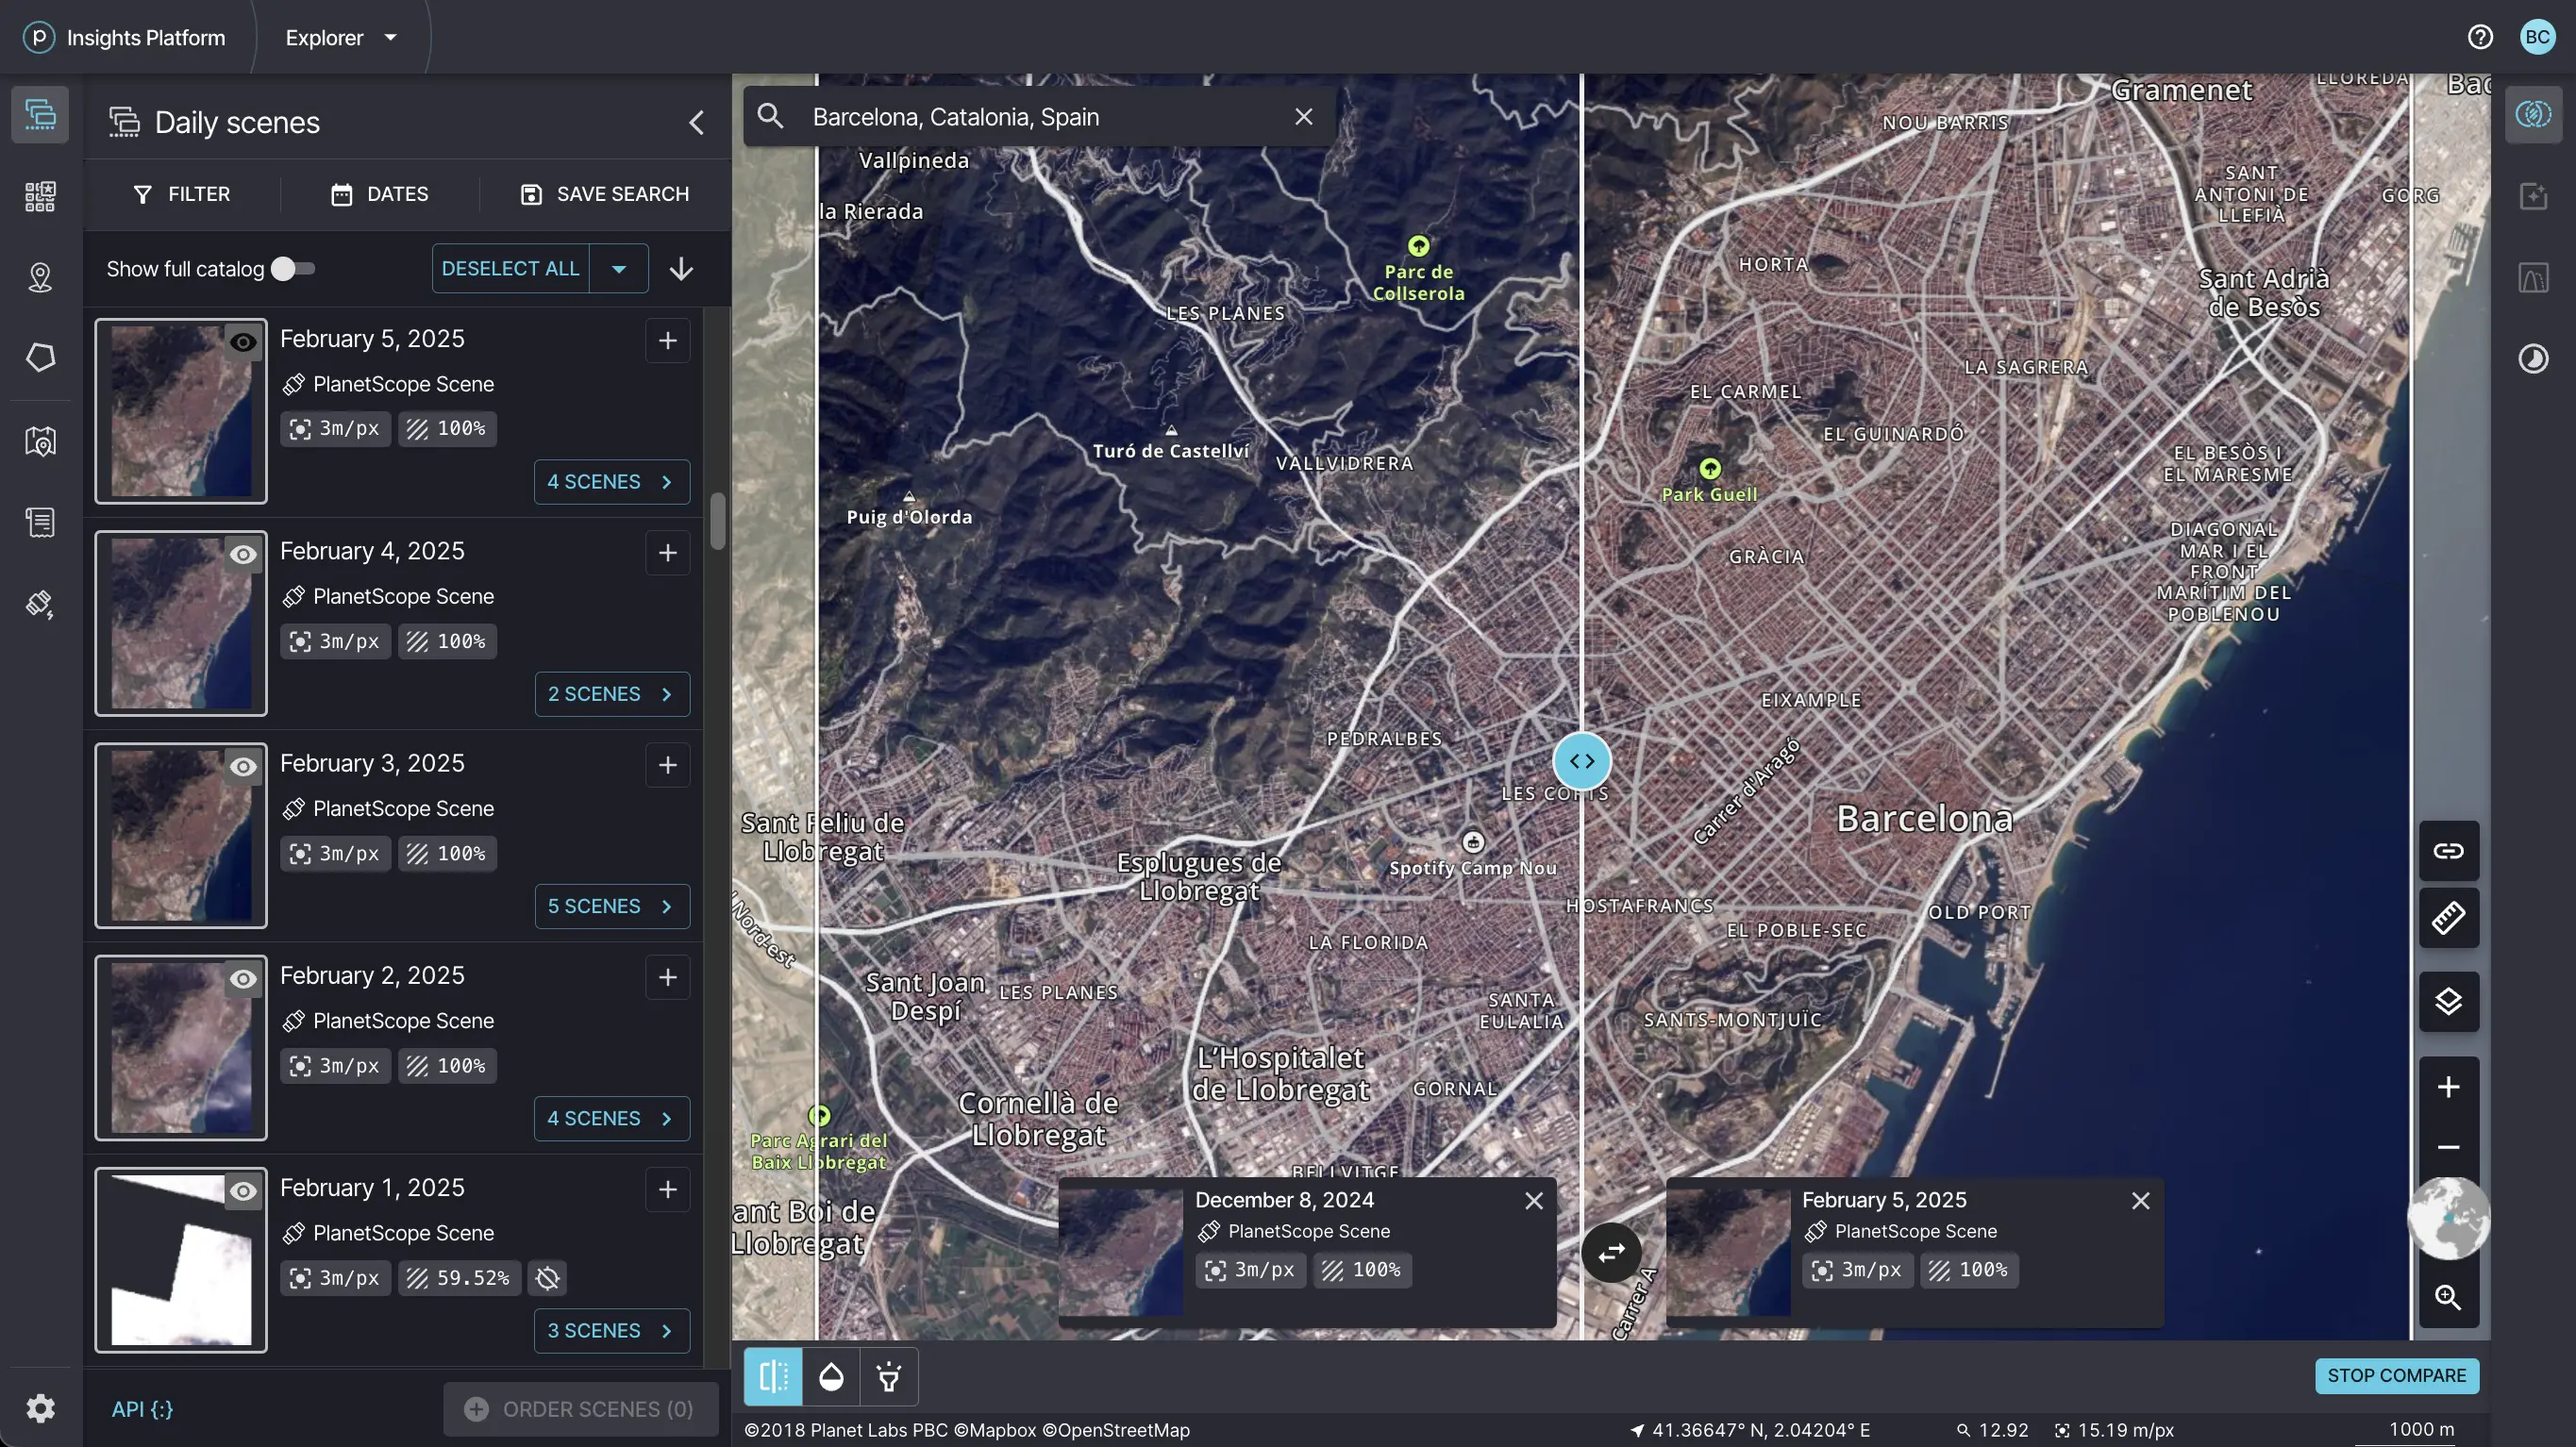
Compare scene tiles in Planet Explorer.